Another everyday case that can be treated successfully by every clinician in a minimal-invasive, predictable and biologically sound way.
The Cervico tools and an osteoinductive synthetic biomaterial were used not only to create new soft and hard tissues, but also to generate the proper emergence profile around the implant.
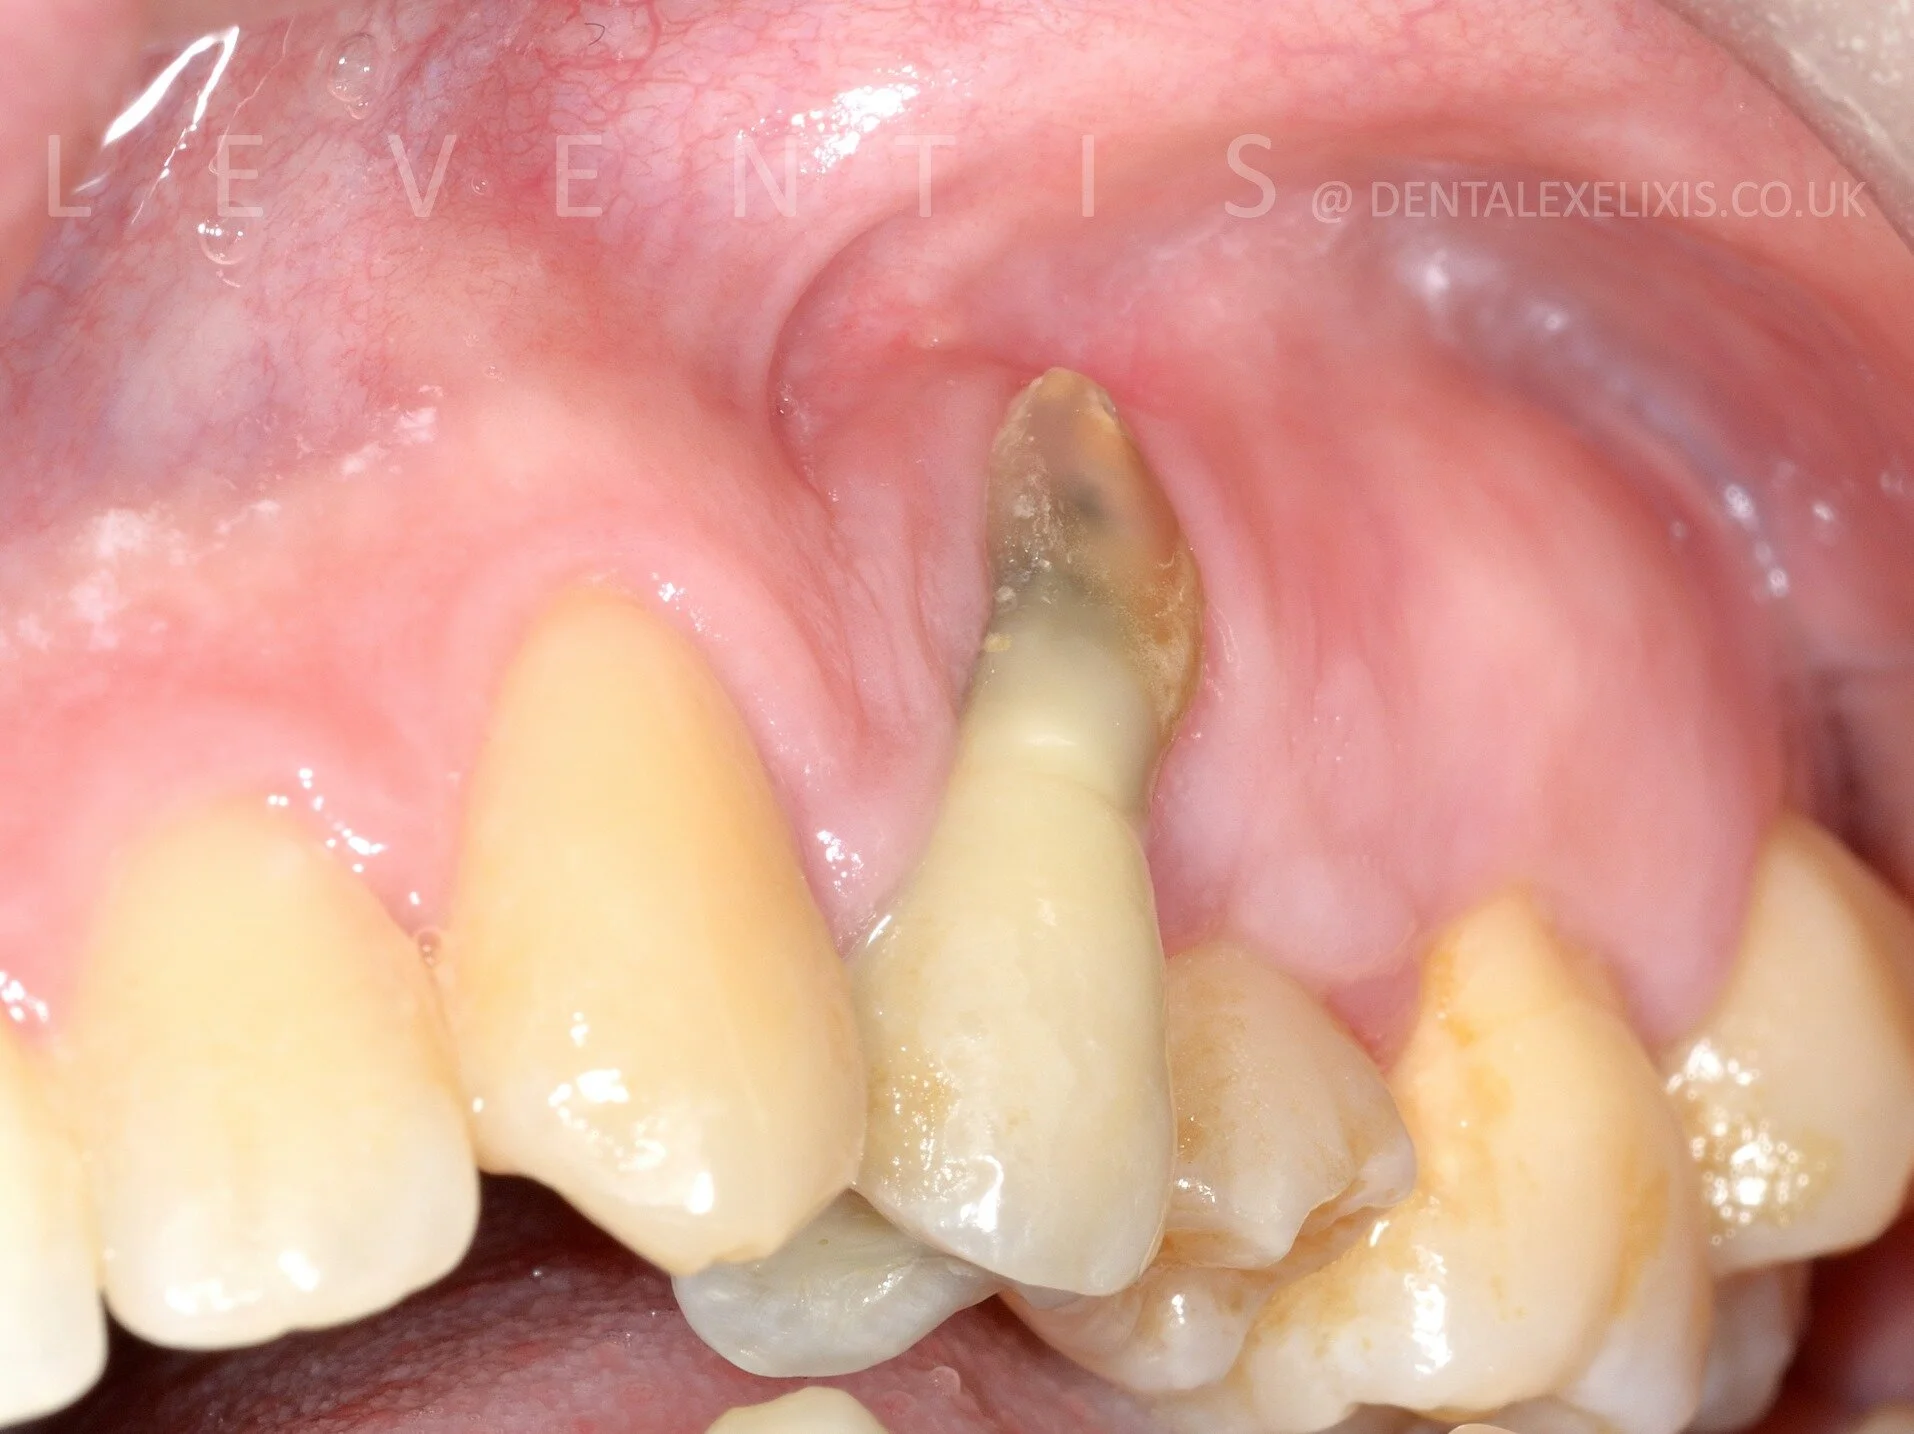
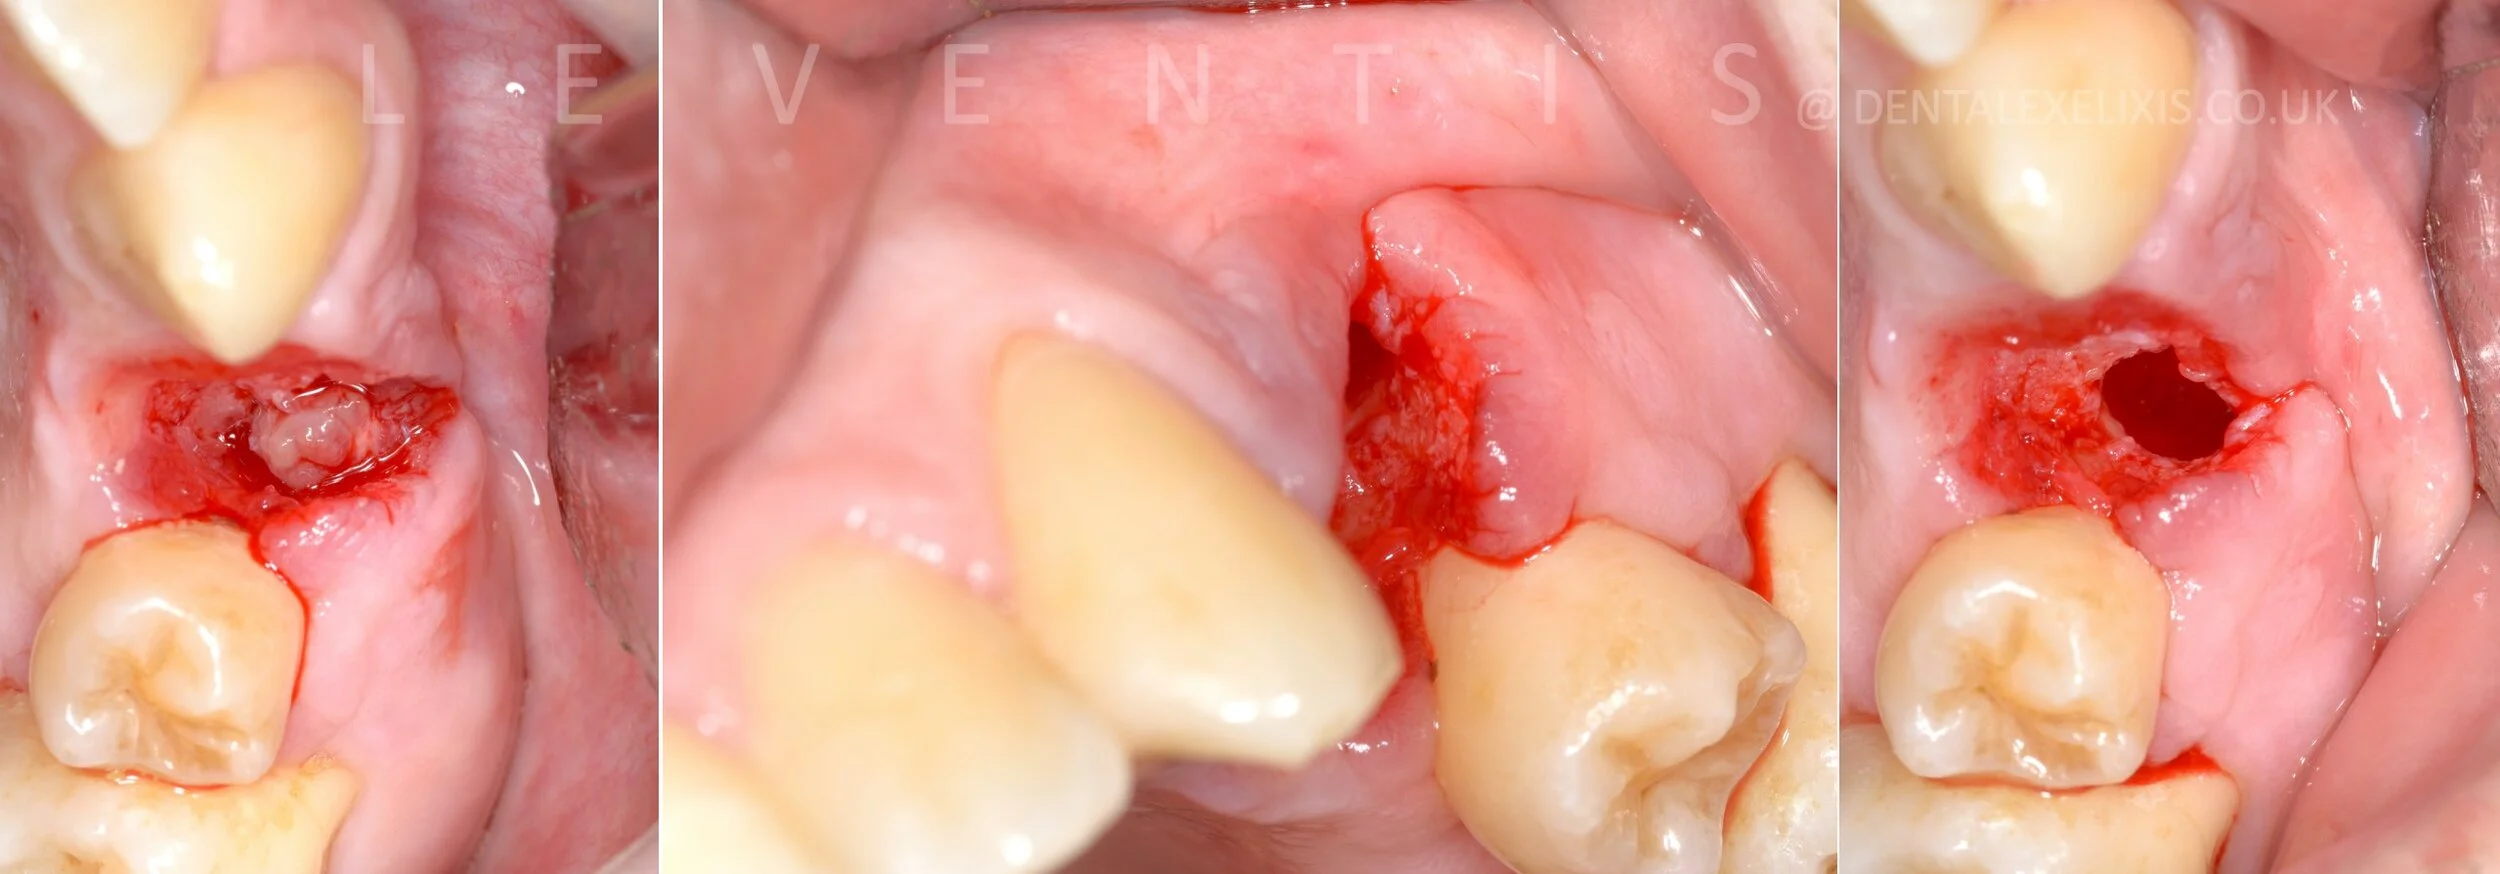
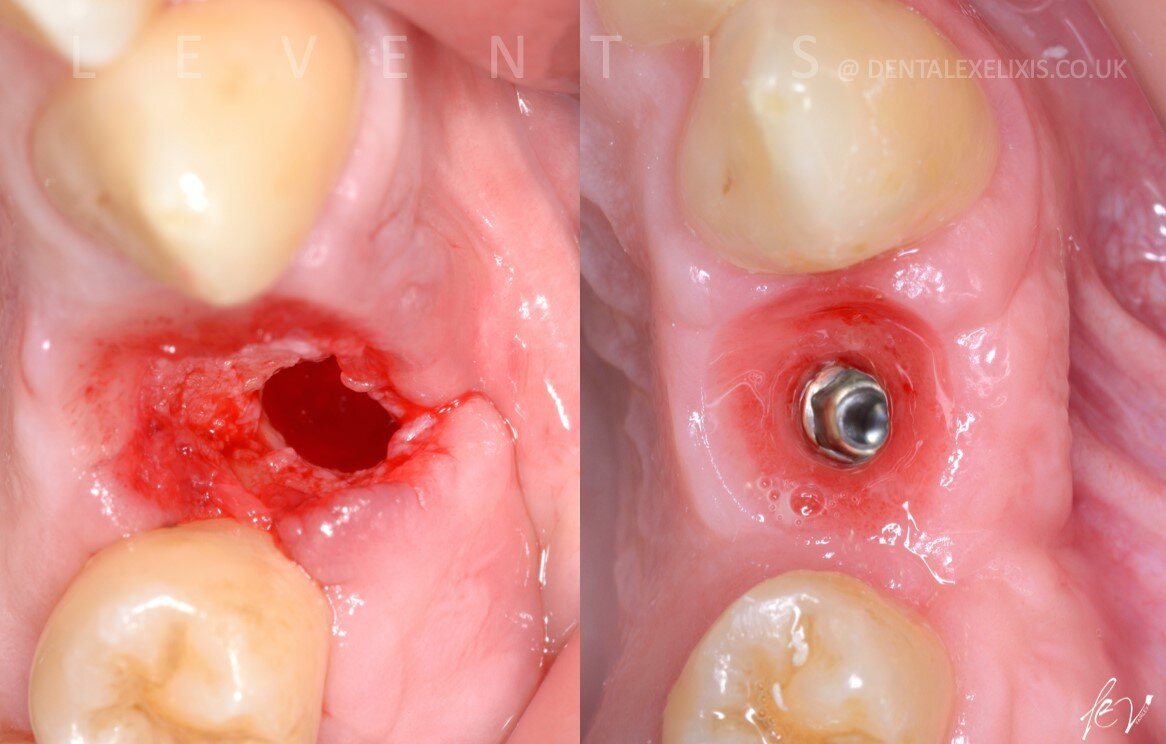
Initial situation.
Generating the supra-crestal attached tissues around implants in everyday clinical practice following minimally invasive protocols, osteoinductive synthetic bone grafting materials and innovative tools.
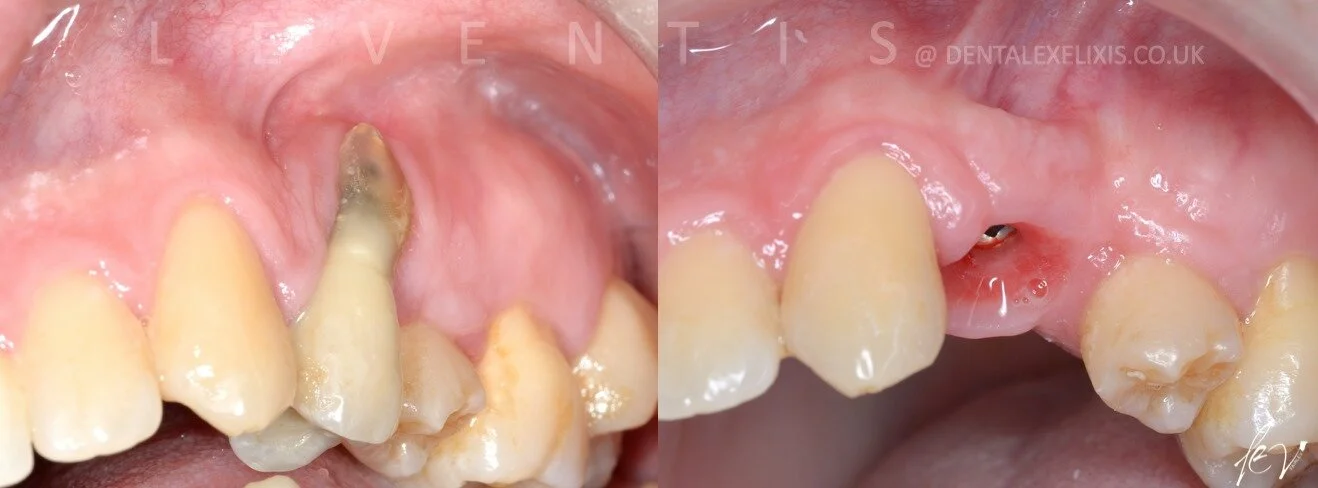
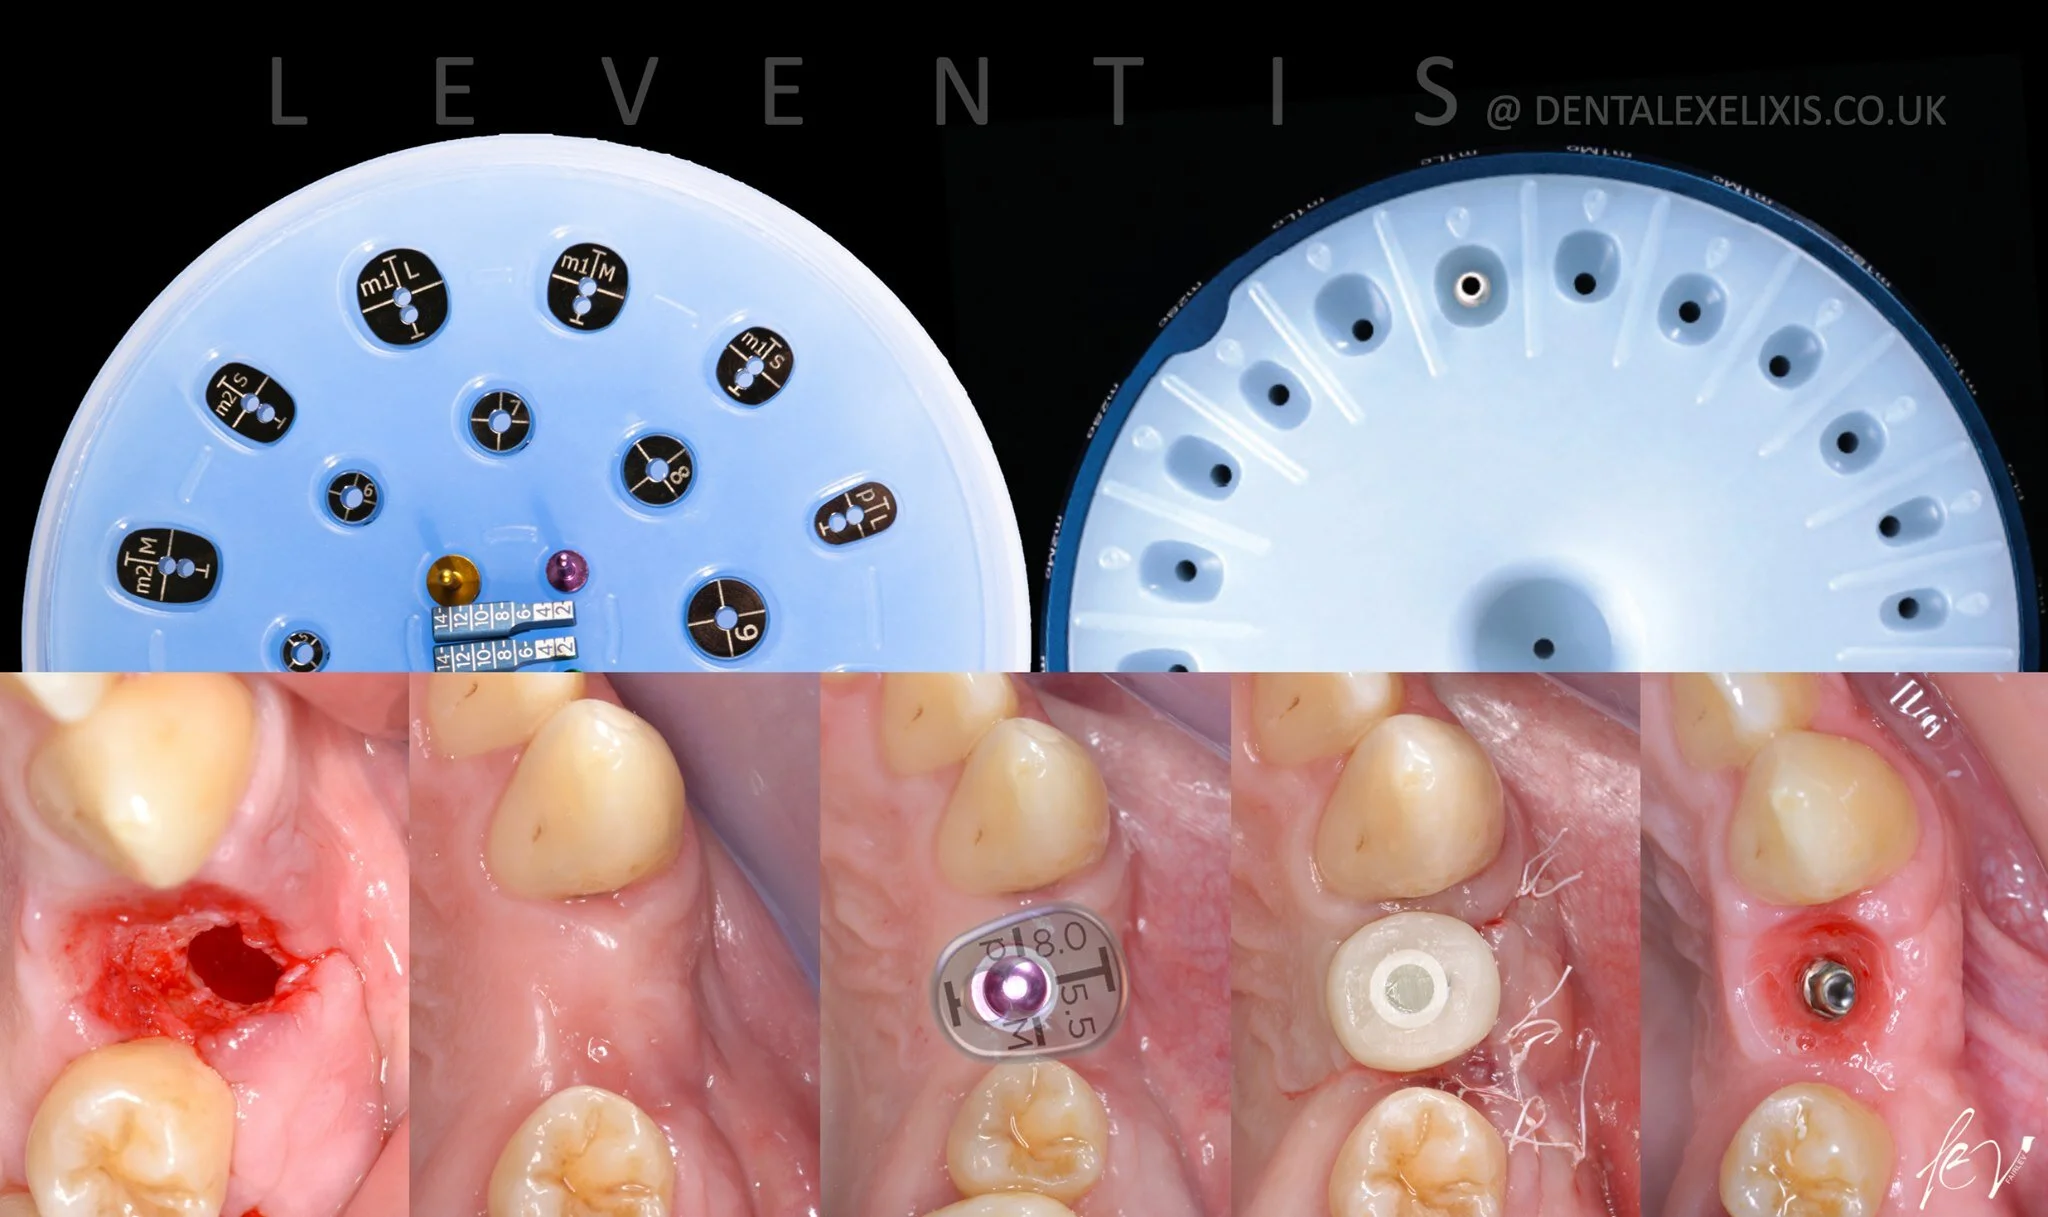
Simple extraction and enucleation of the small cyst.
No bone or soft tissues present buccally.
It is important to let the site heal under secondary intention so that new hard and soft tissues will regenerate spontaneously.
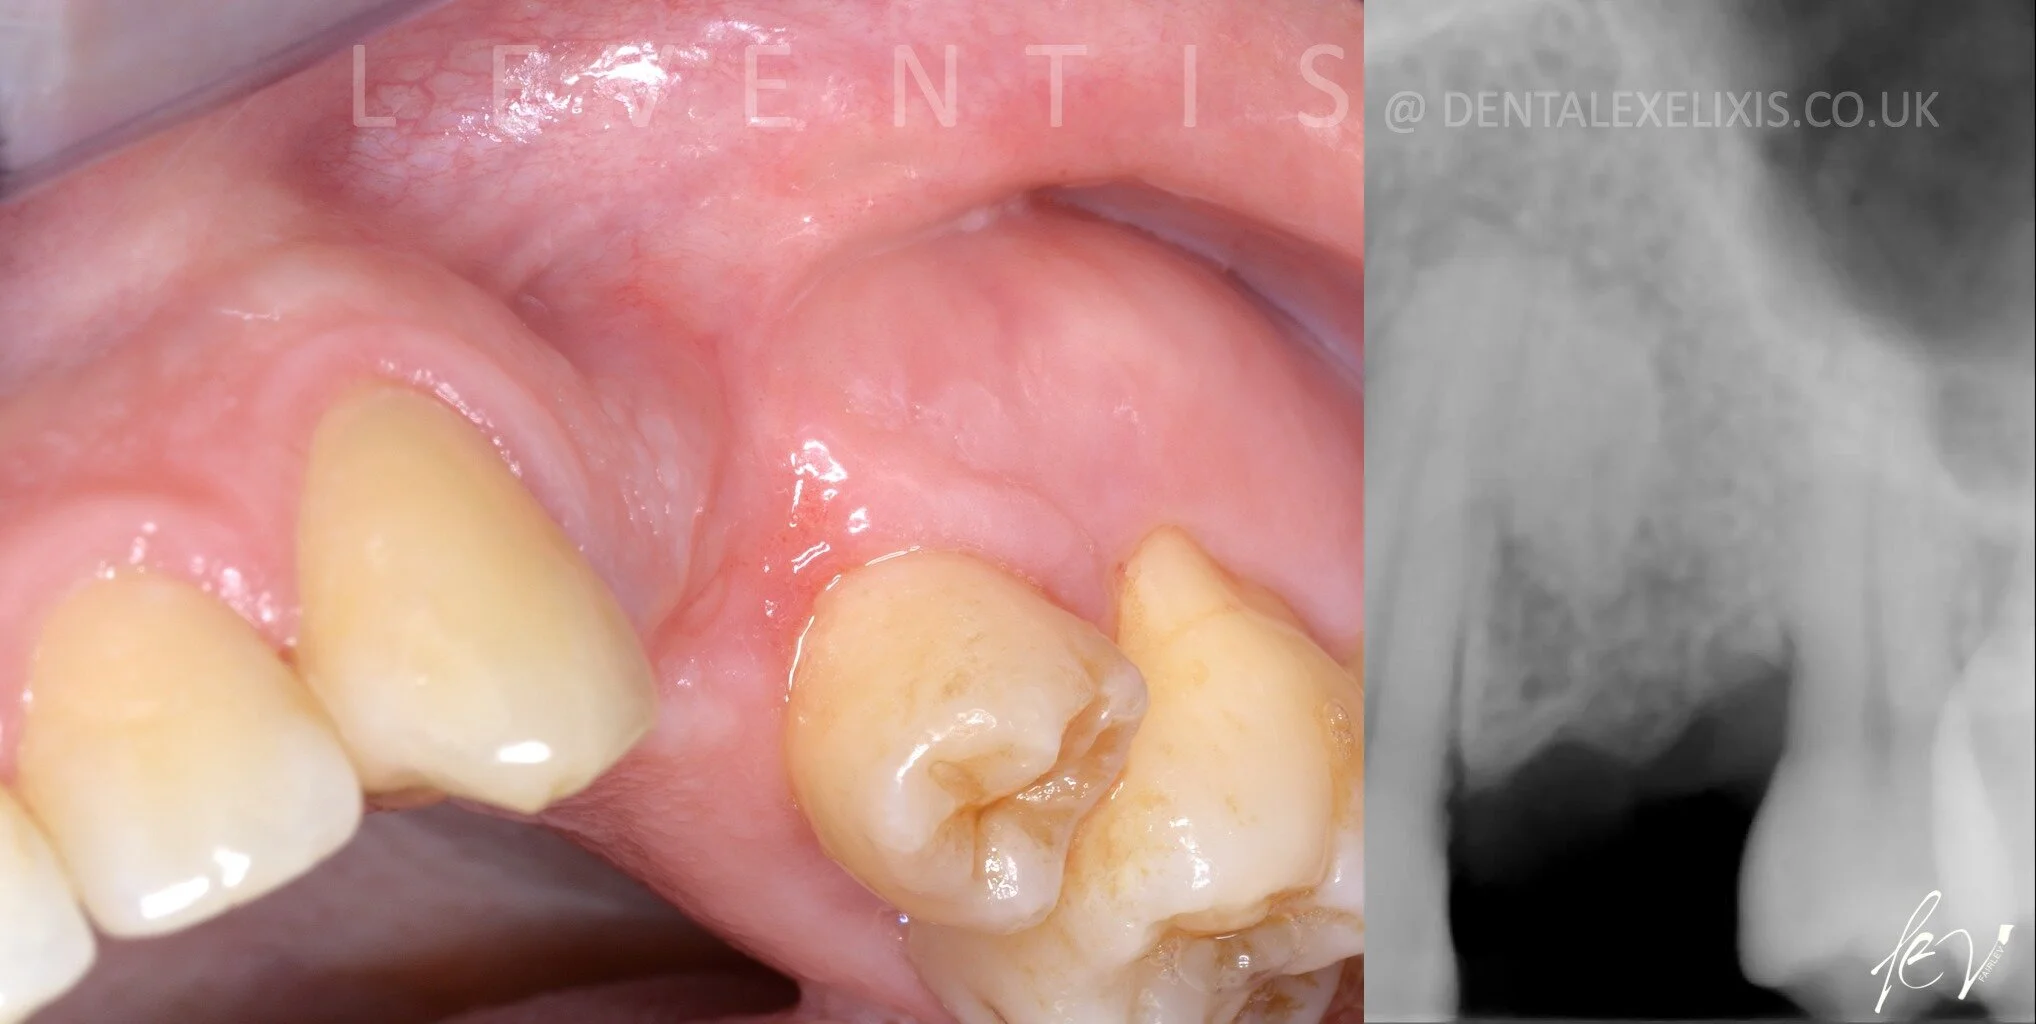
Clinical and radiological views 5 months after the simple extraction and the secondary intention healing of the area.
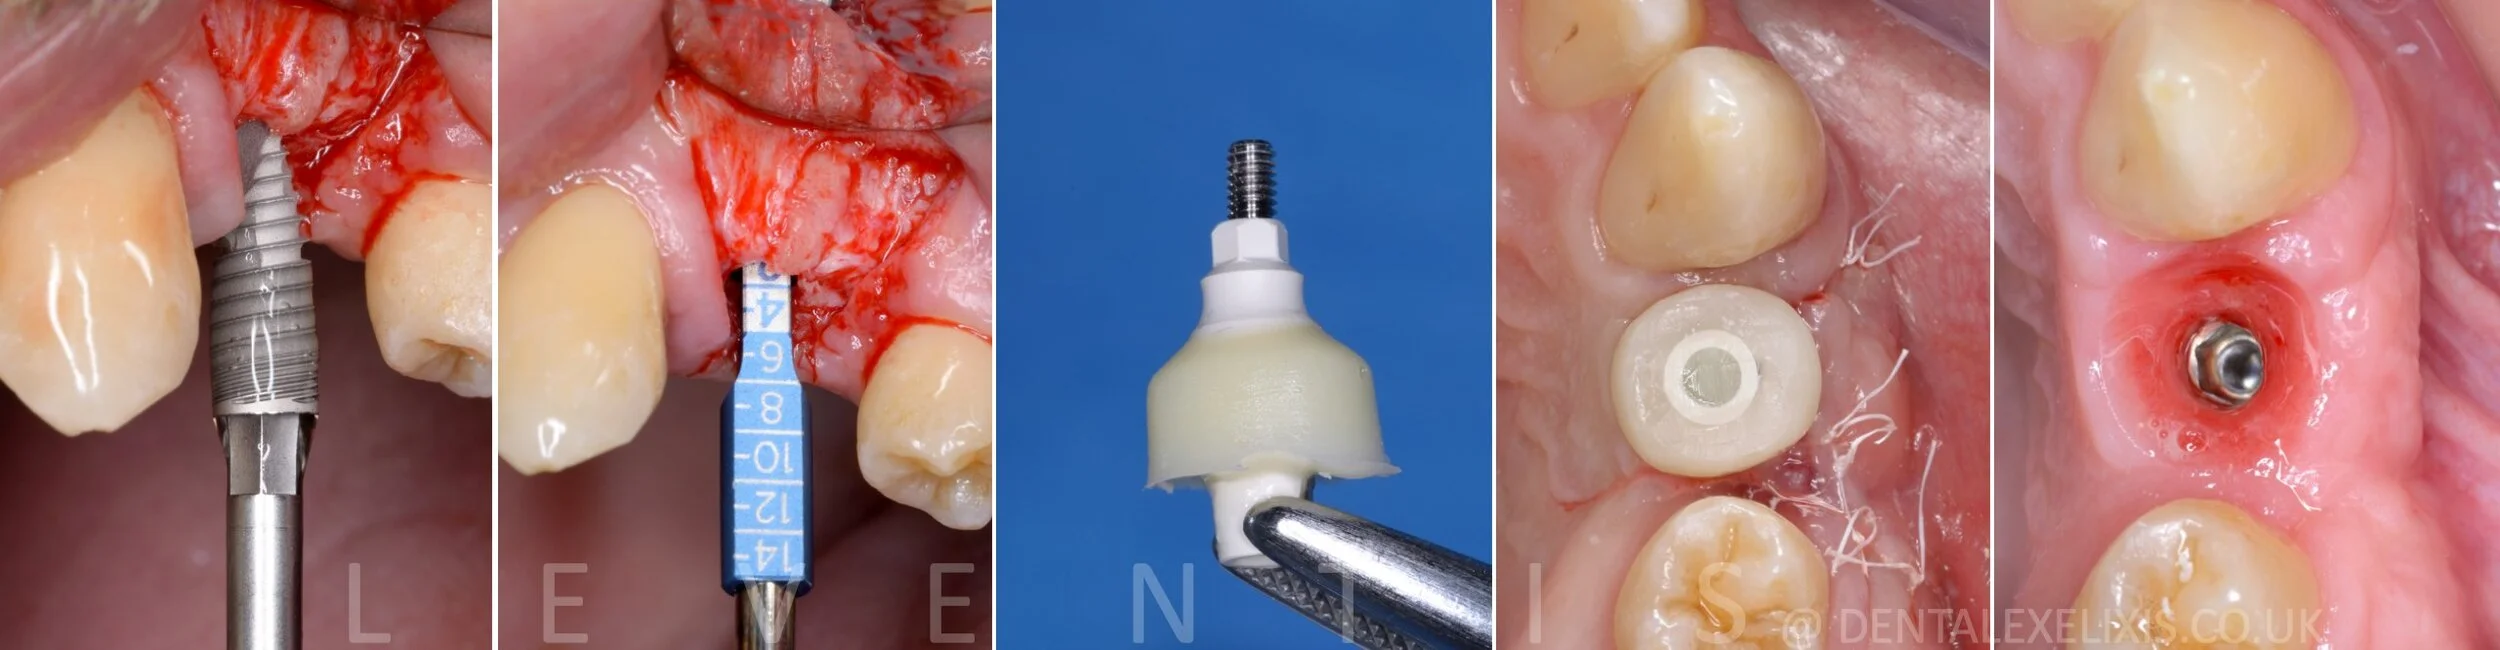
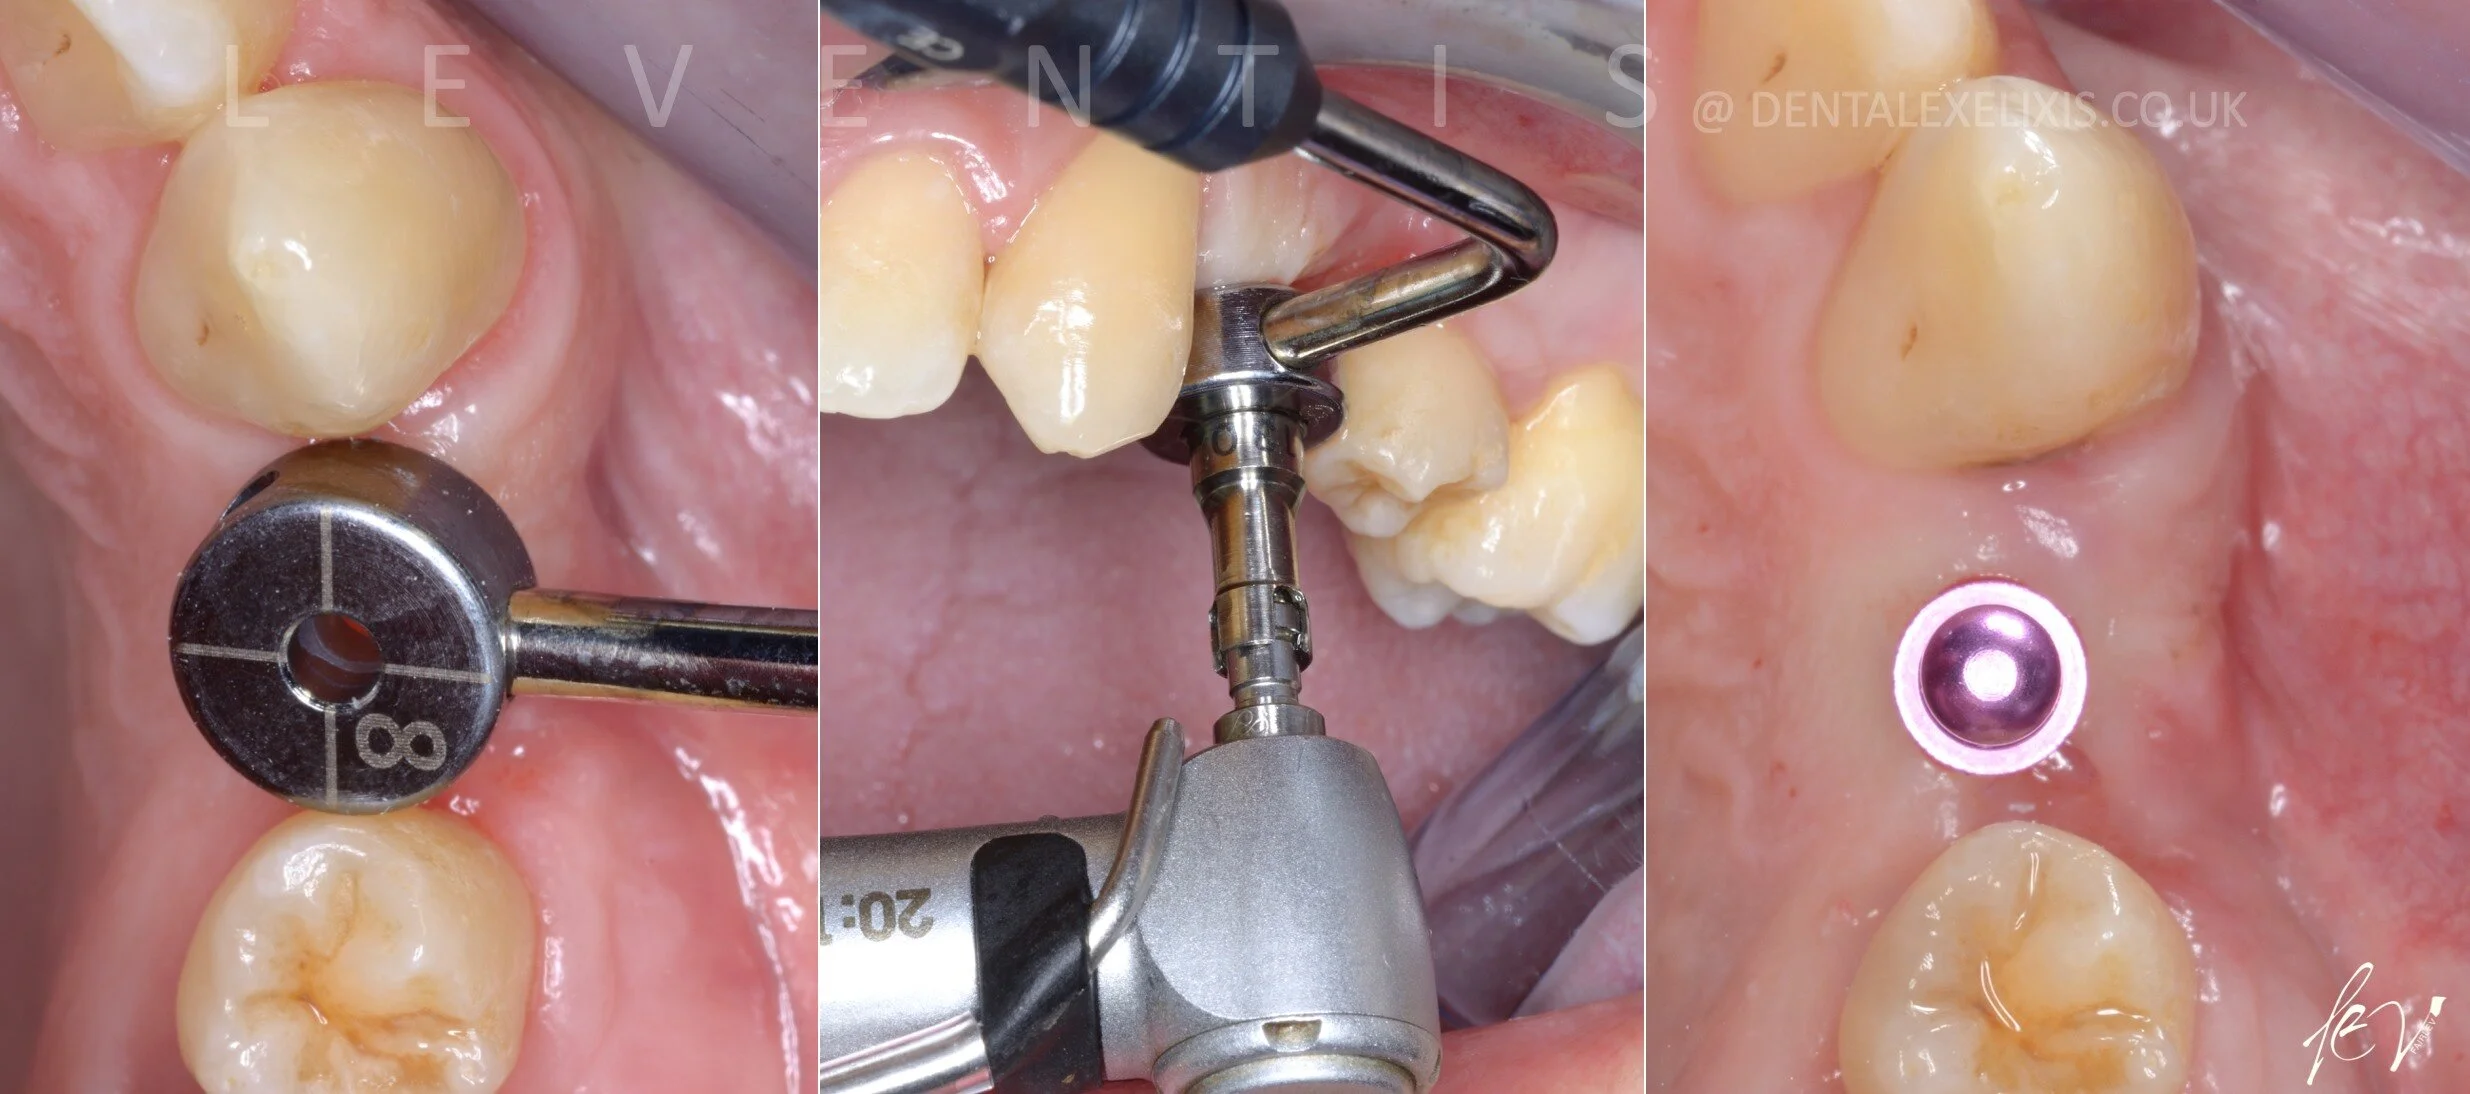
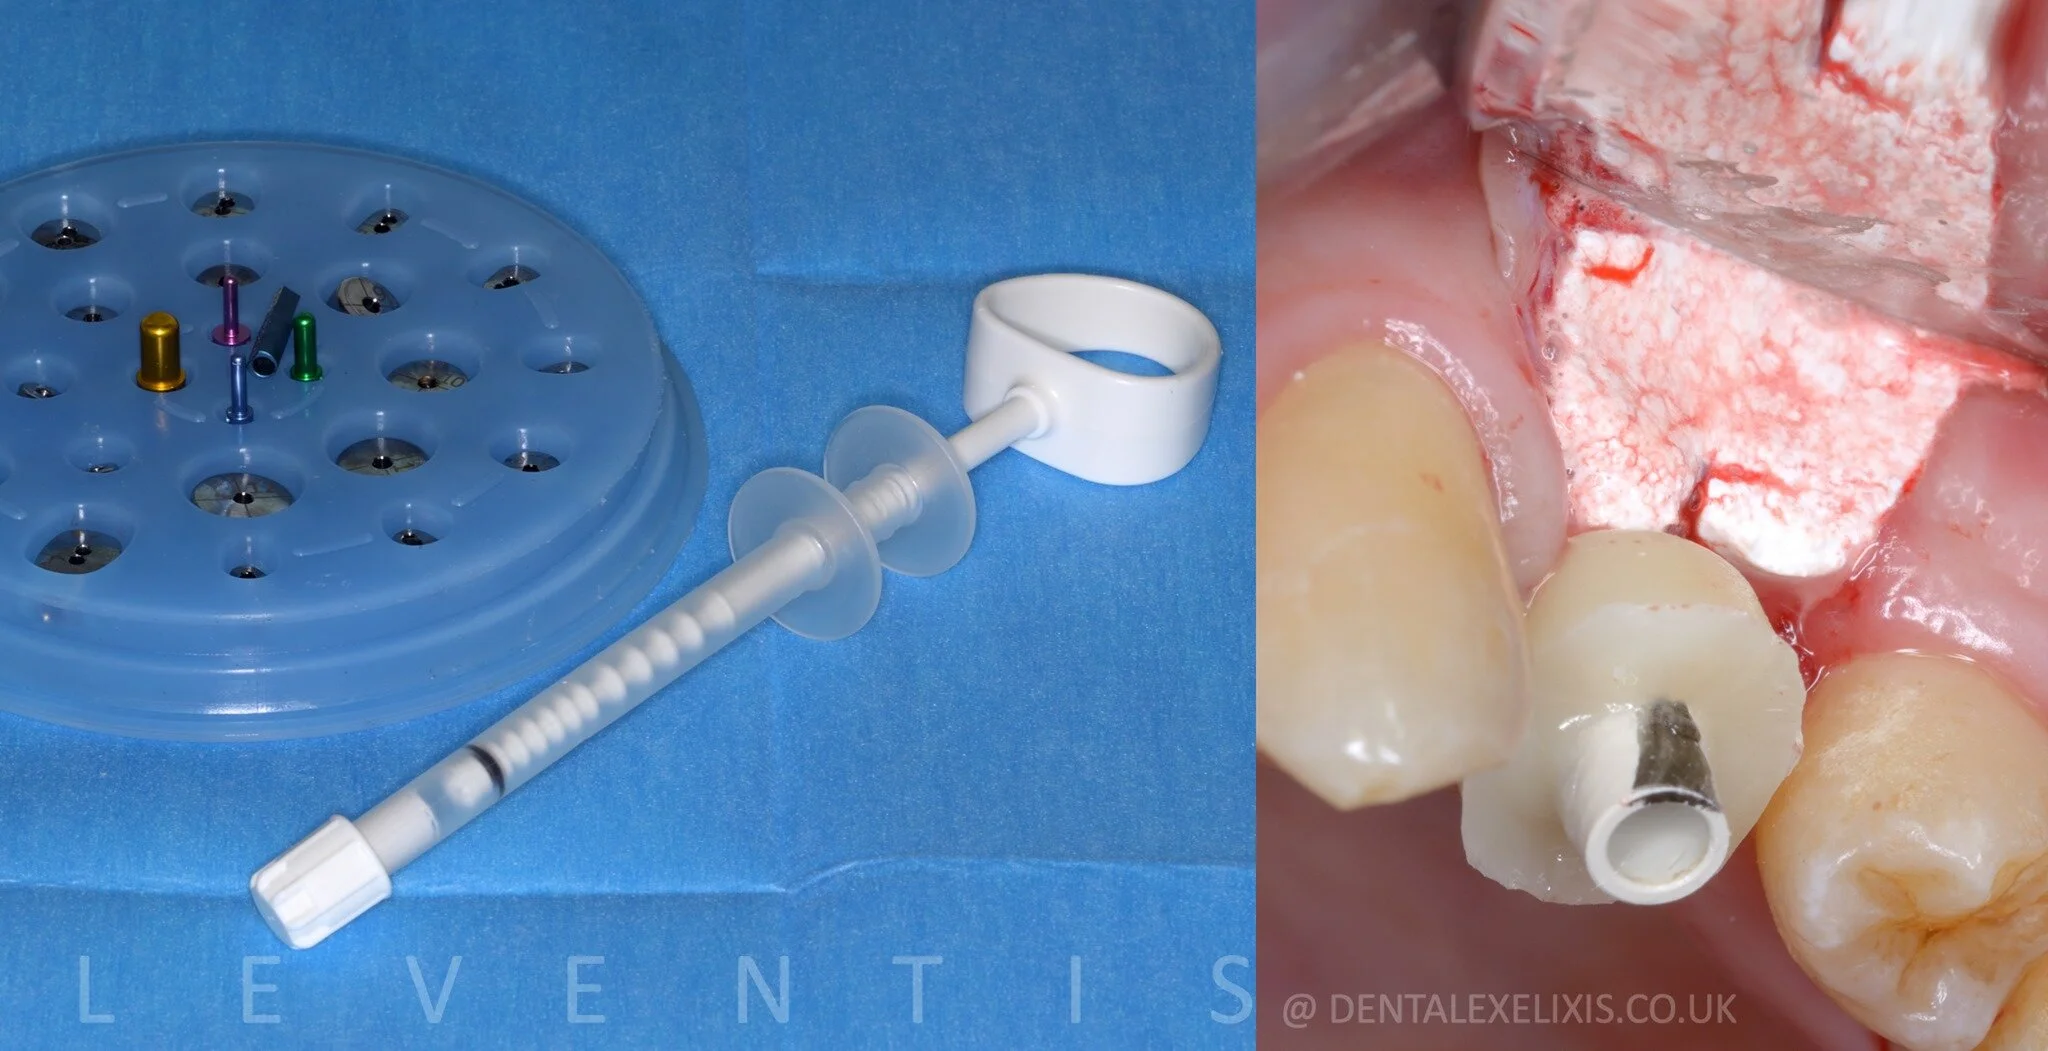
The Cervico guide was used to evaluate intraorally the edentulous area before the surgery. Using the appropriate cylindrical tab the prosthetic space was accurately measured. This tab was used also as a surgical stent to guide the initial trephination.
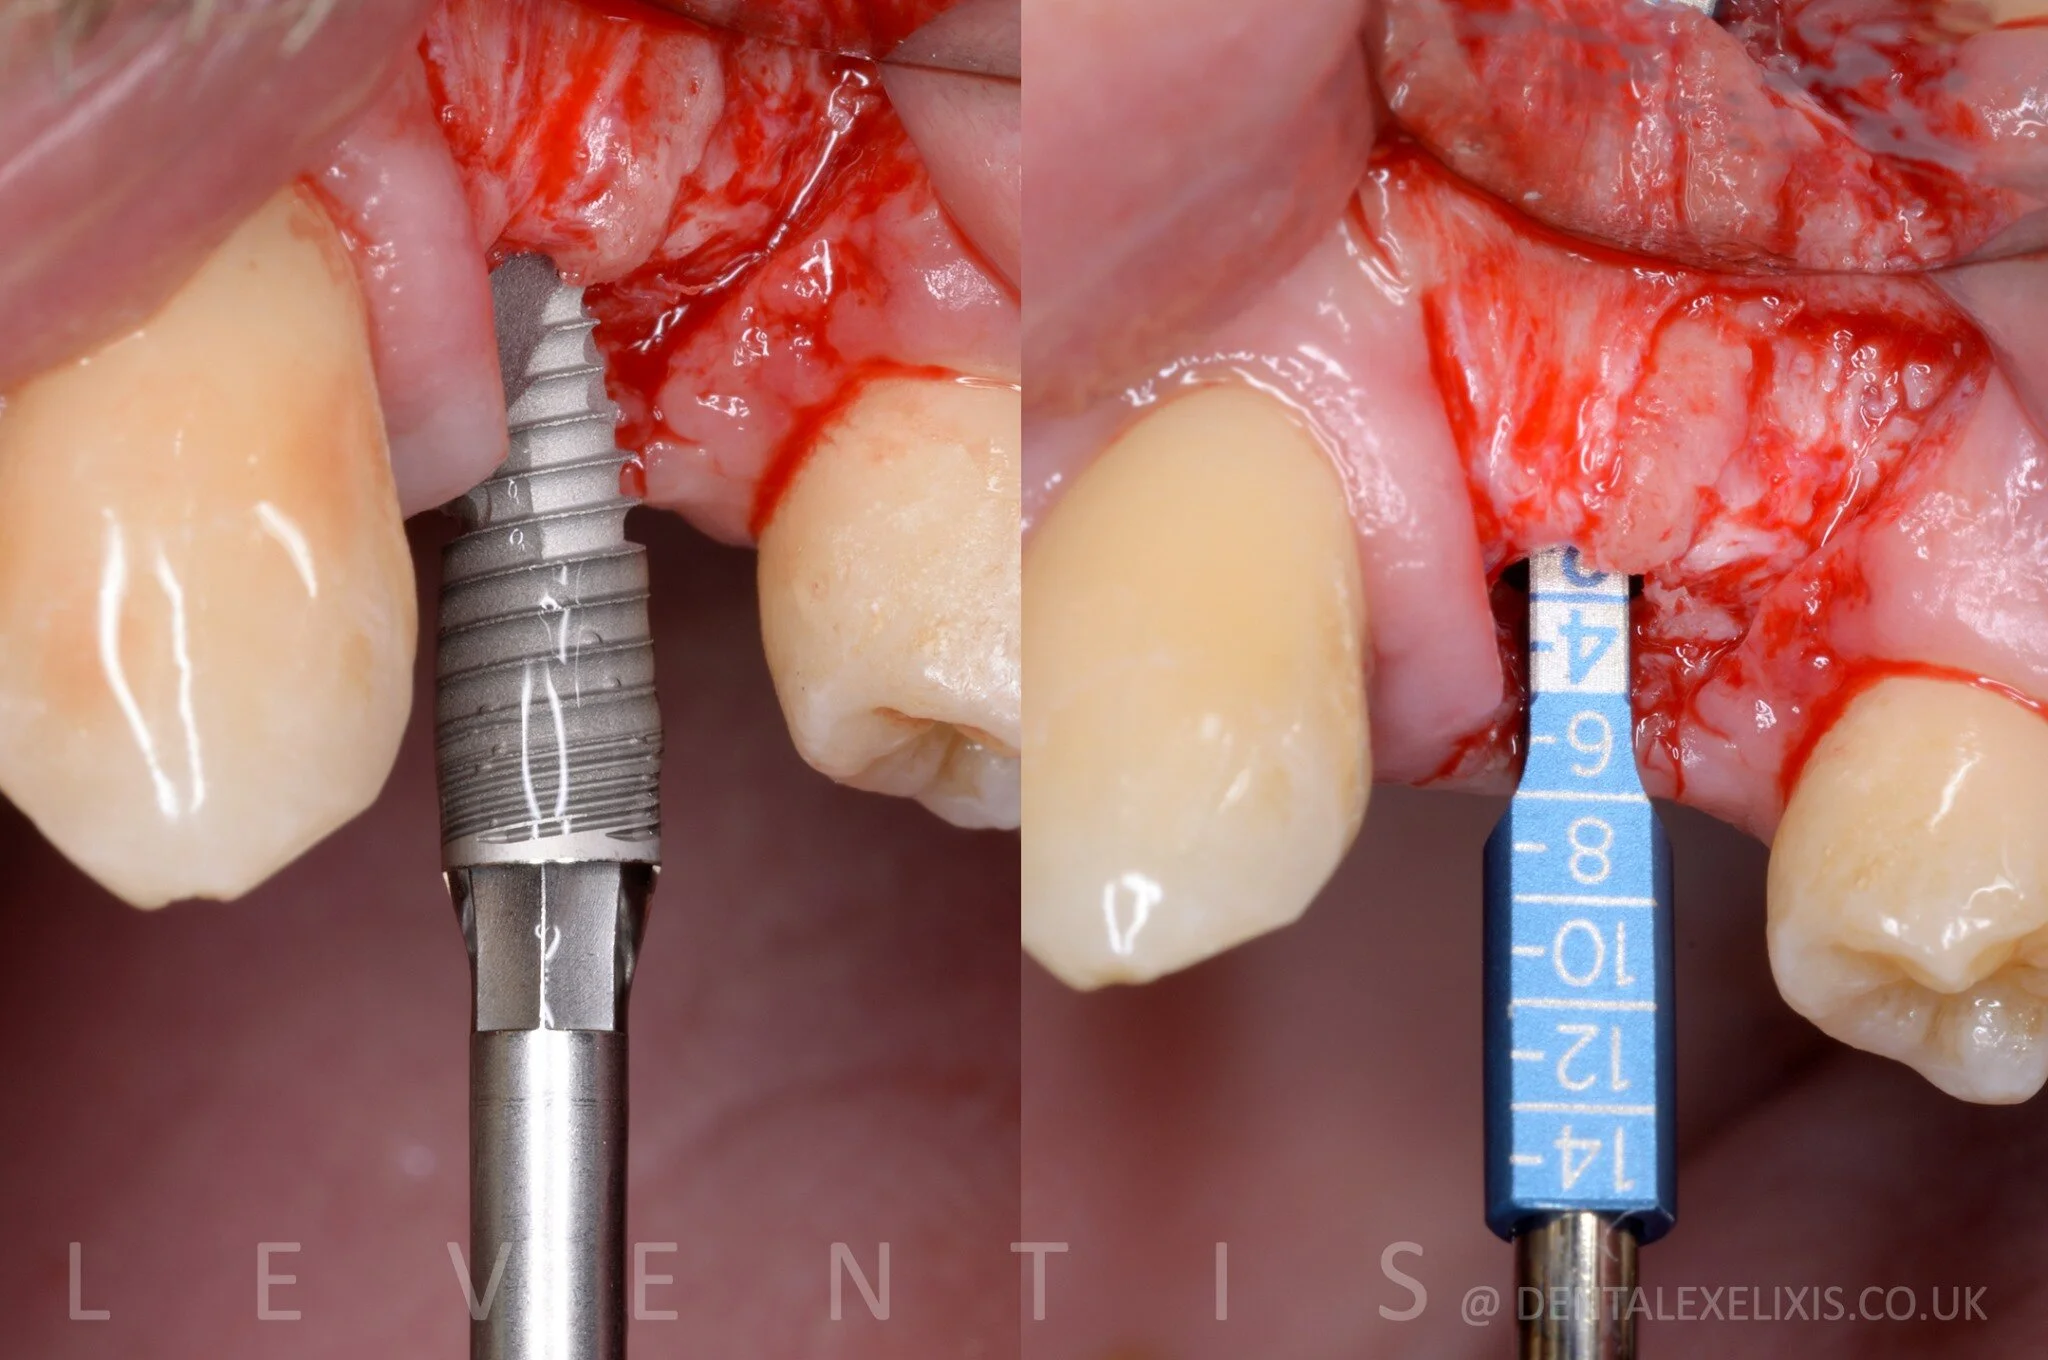
A site-specific full-thickness flap was raised and a 3.75×11.5 Keystone Paltop Dynamic implant was placed 1 mm subrectally achieving high initial stability. The Cervico depth gauge was used to measure the depth of placement and the thickness of the overlying soft tissues. Ideally, 4mm distance from the implant platform to the zenith of the prosthesis, where the soft tissue margin of the future implant crown will be located, is needed.
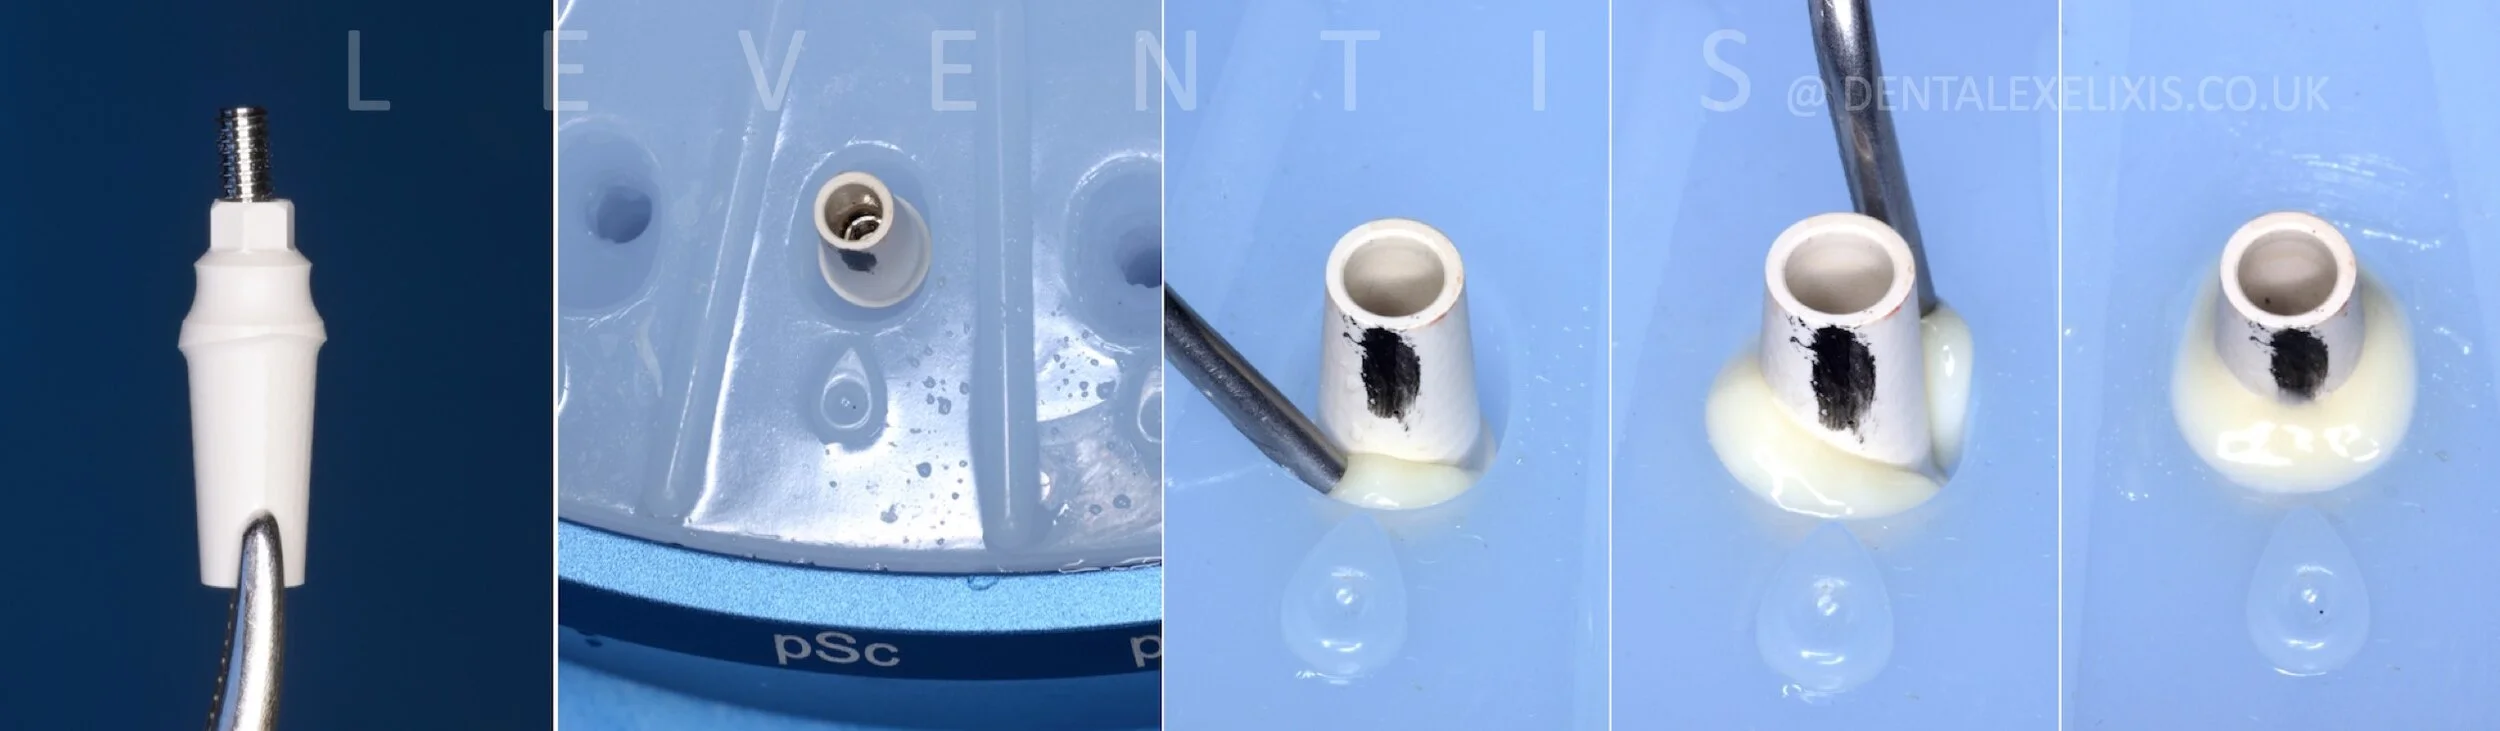
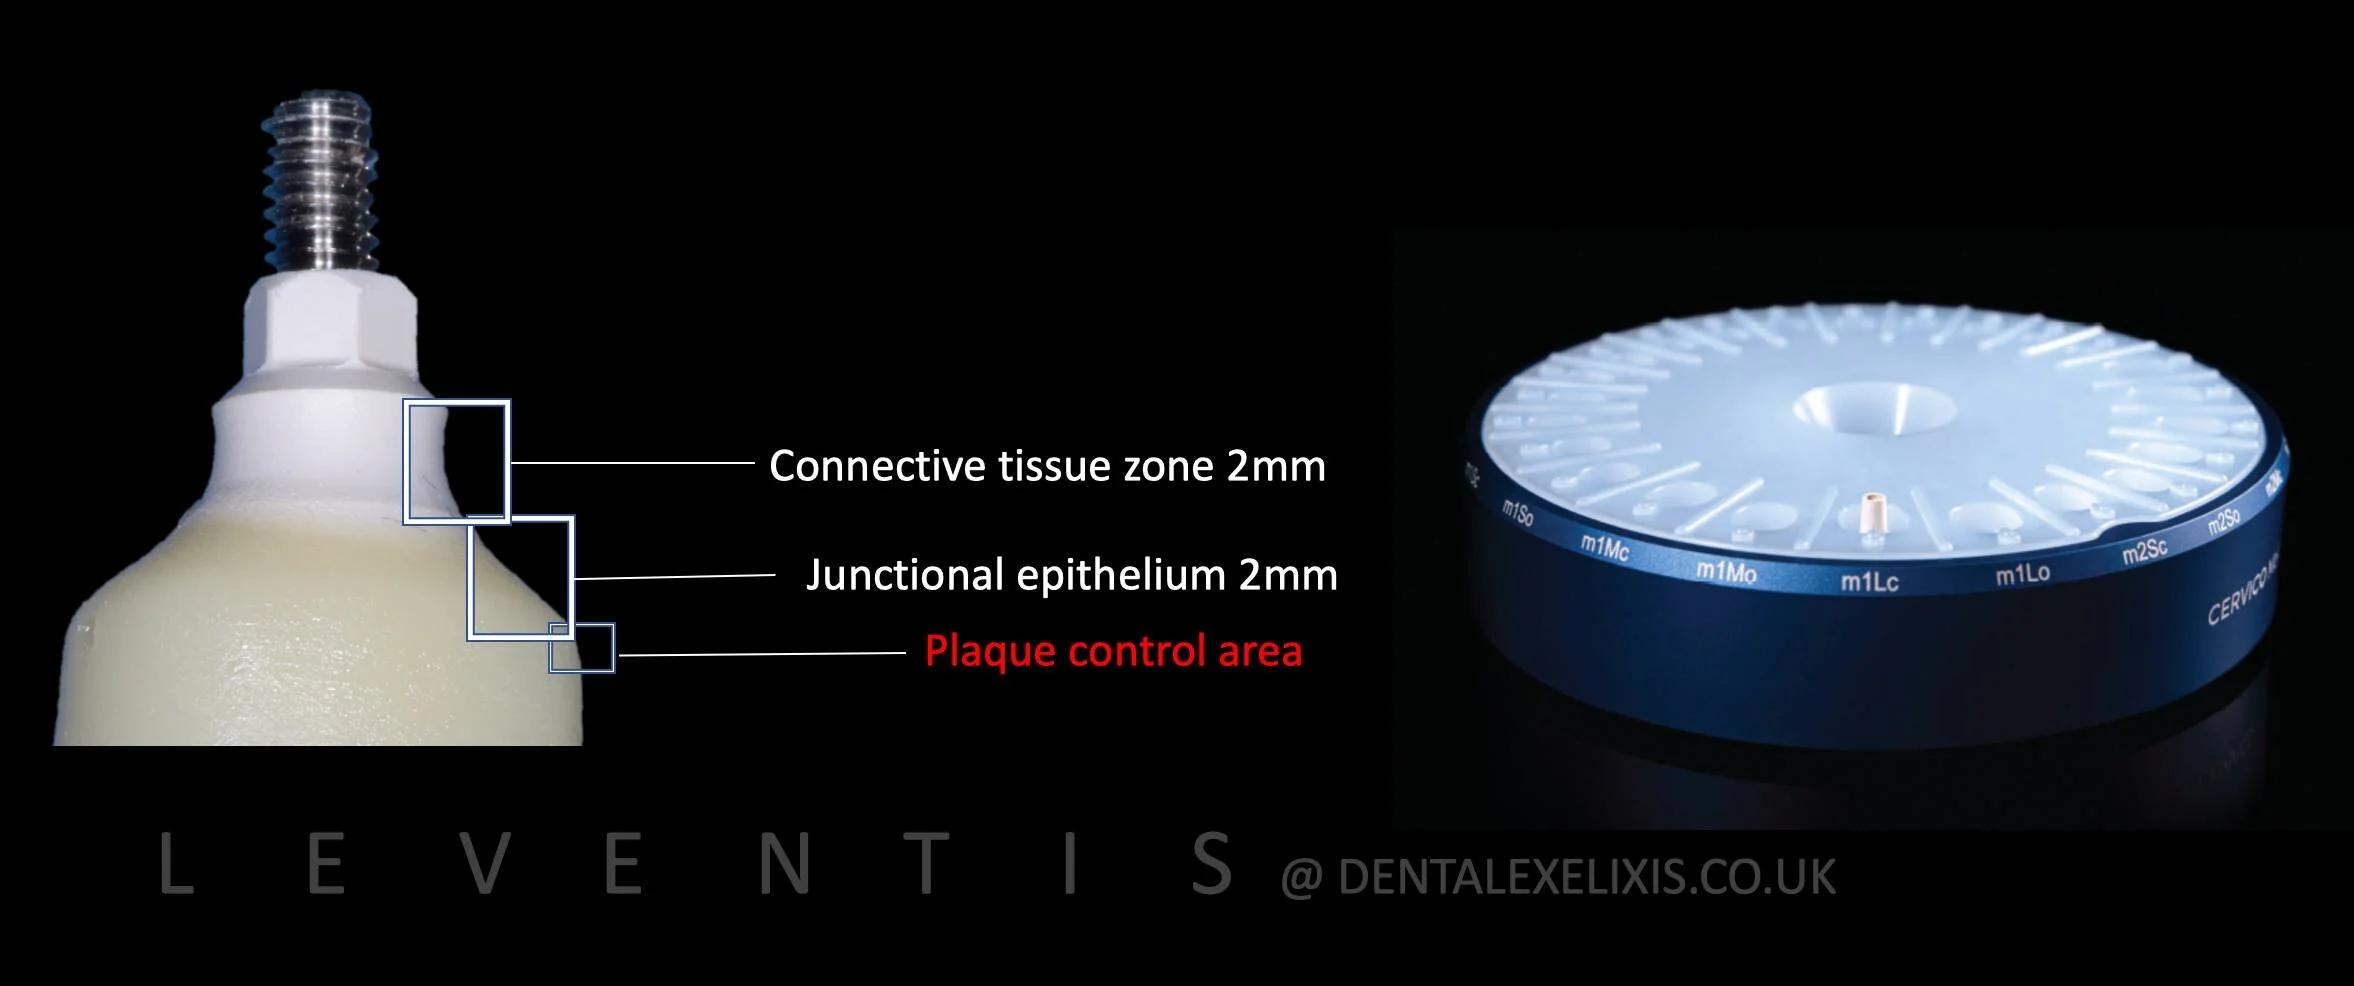
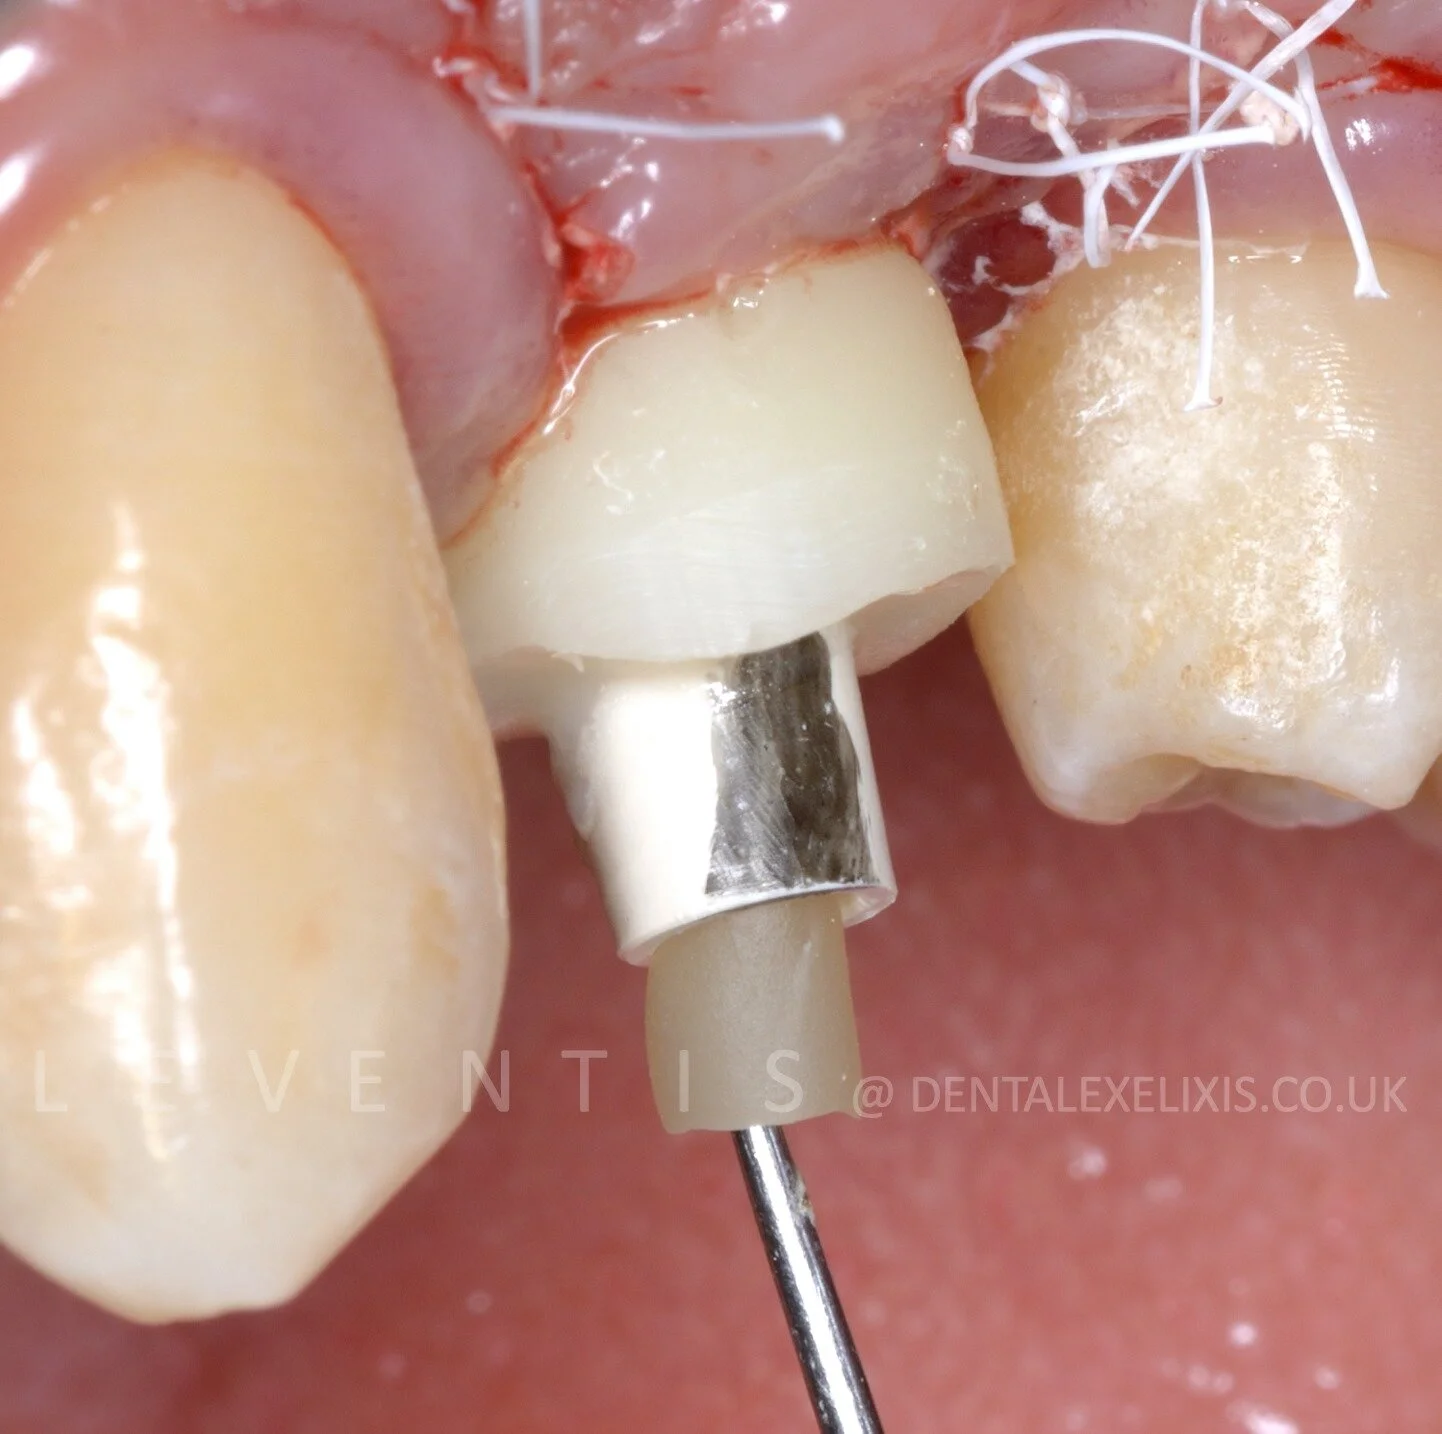
The Cervico Essential mold was used to fabricate the customised healing abutment. The PEEK abutment was installed into the desired well of the mold. Subsequently, flowable composite was injected into the open space of the well around the abutment and light-cured.
Elsodent Purefill Bio+ composite was used which is formulated without the monomers HEMA, TEGDMA or GMA and claimed to be kinder to soft tissue.
The design of the Cervico custom healing abutment will shape the peri-implant soft tissues in such a way that the anatomical components of the implant transmucosal complex will be properly generated to meet all biological and functional requirements.
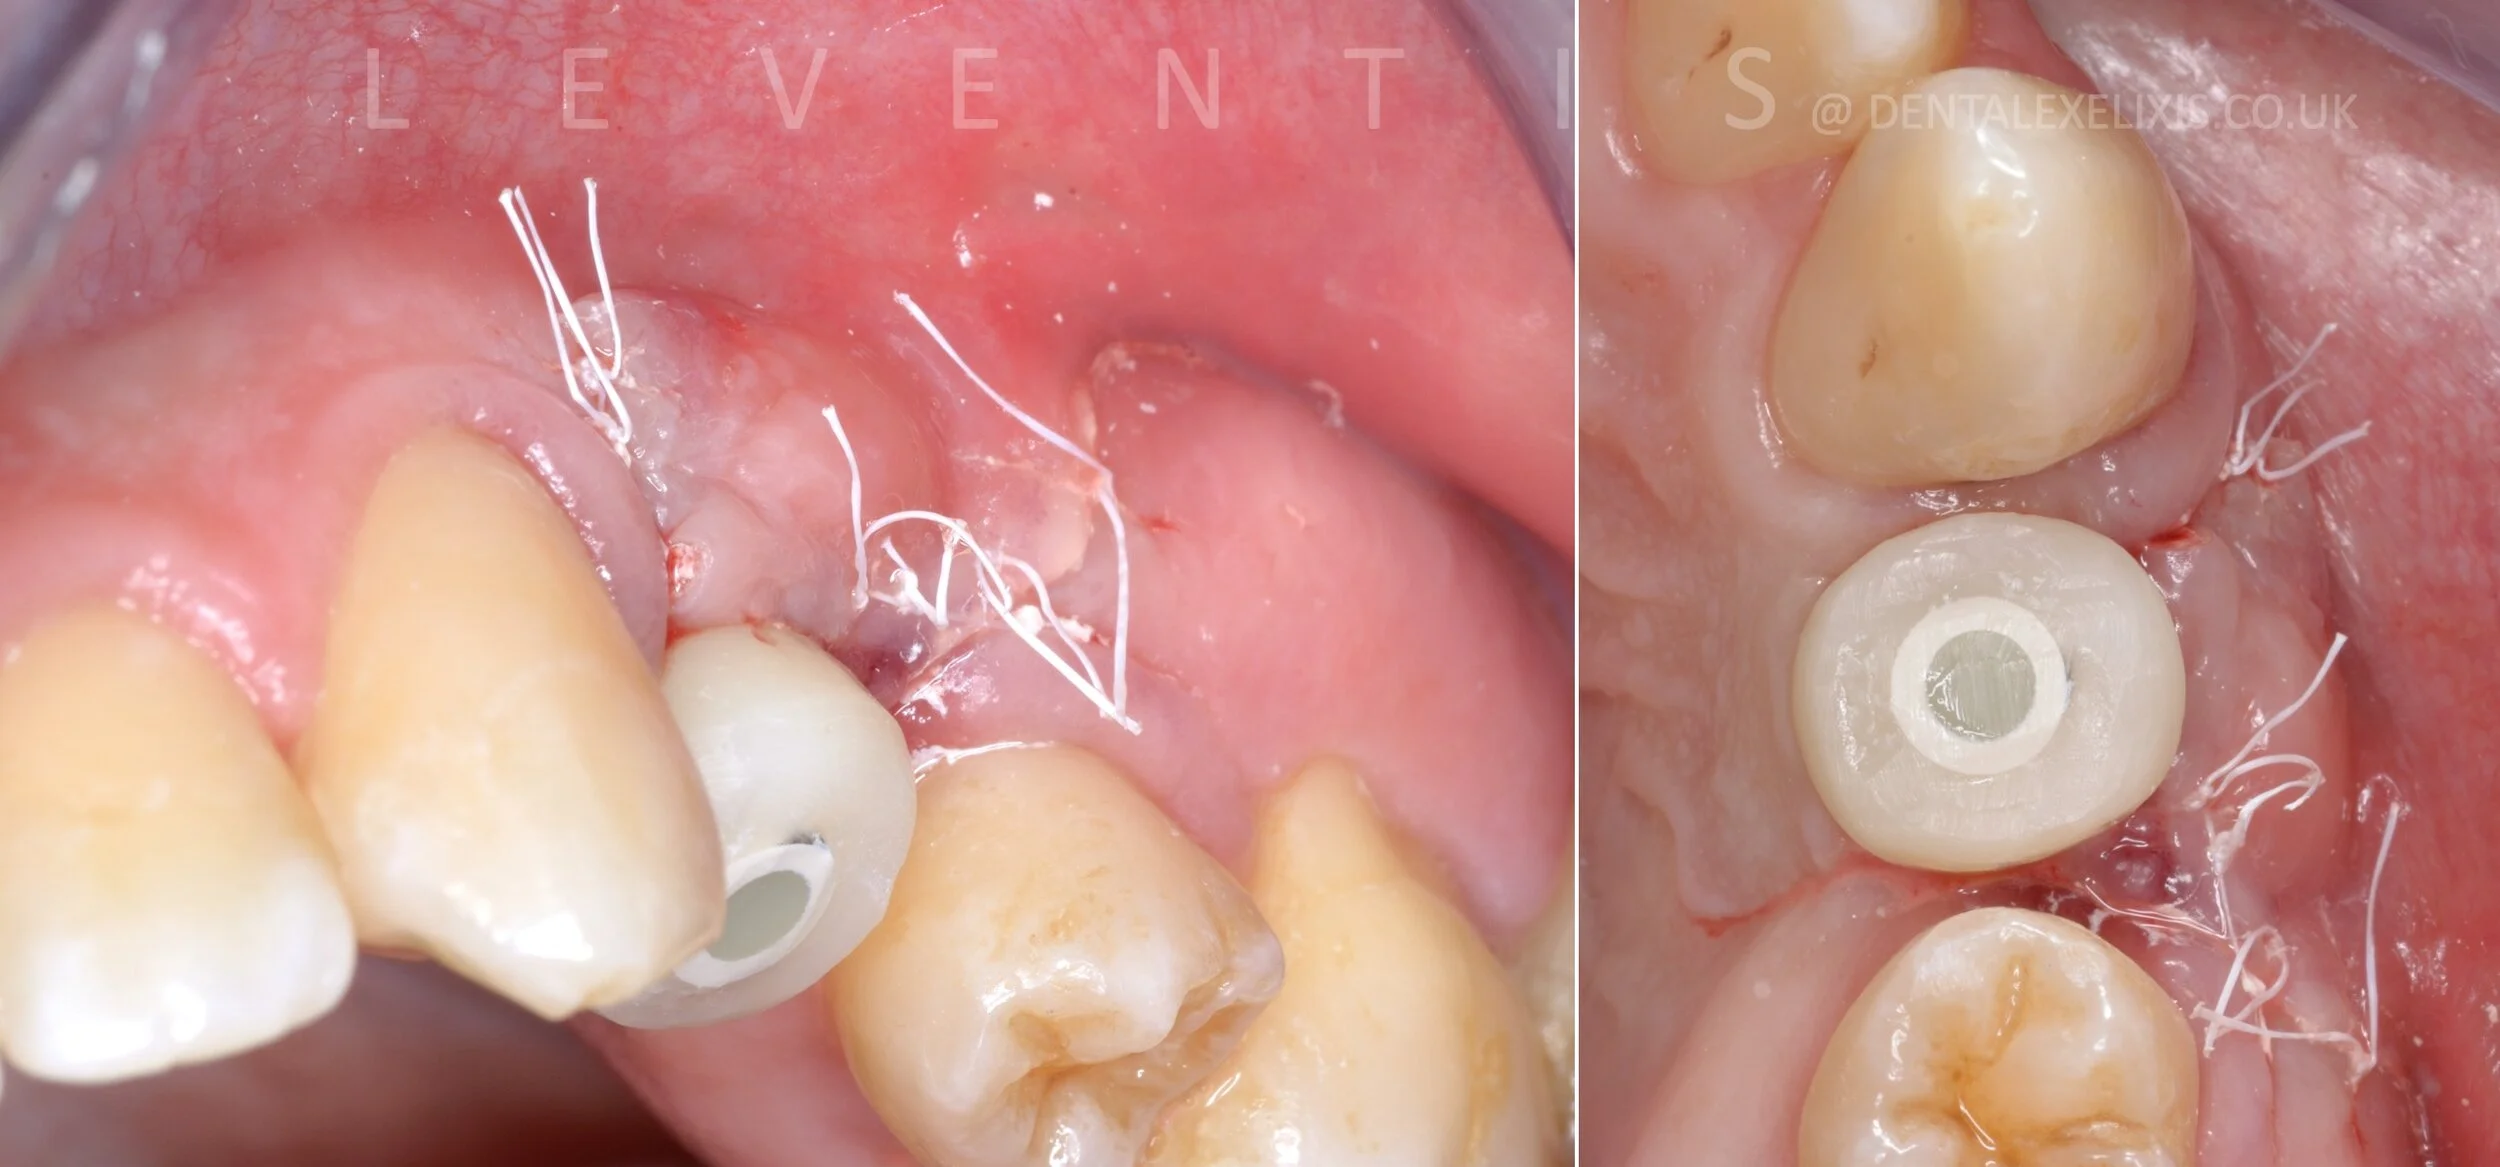
The Cervico custom healing abutment fitted.
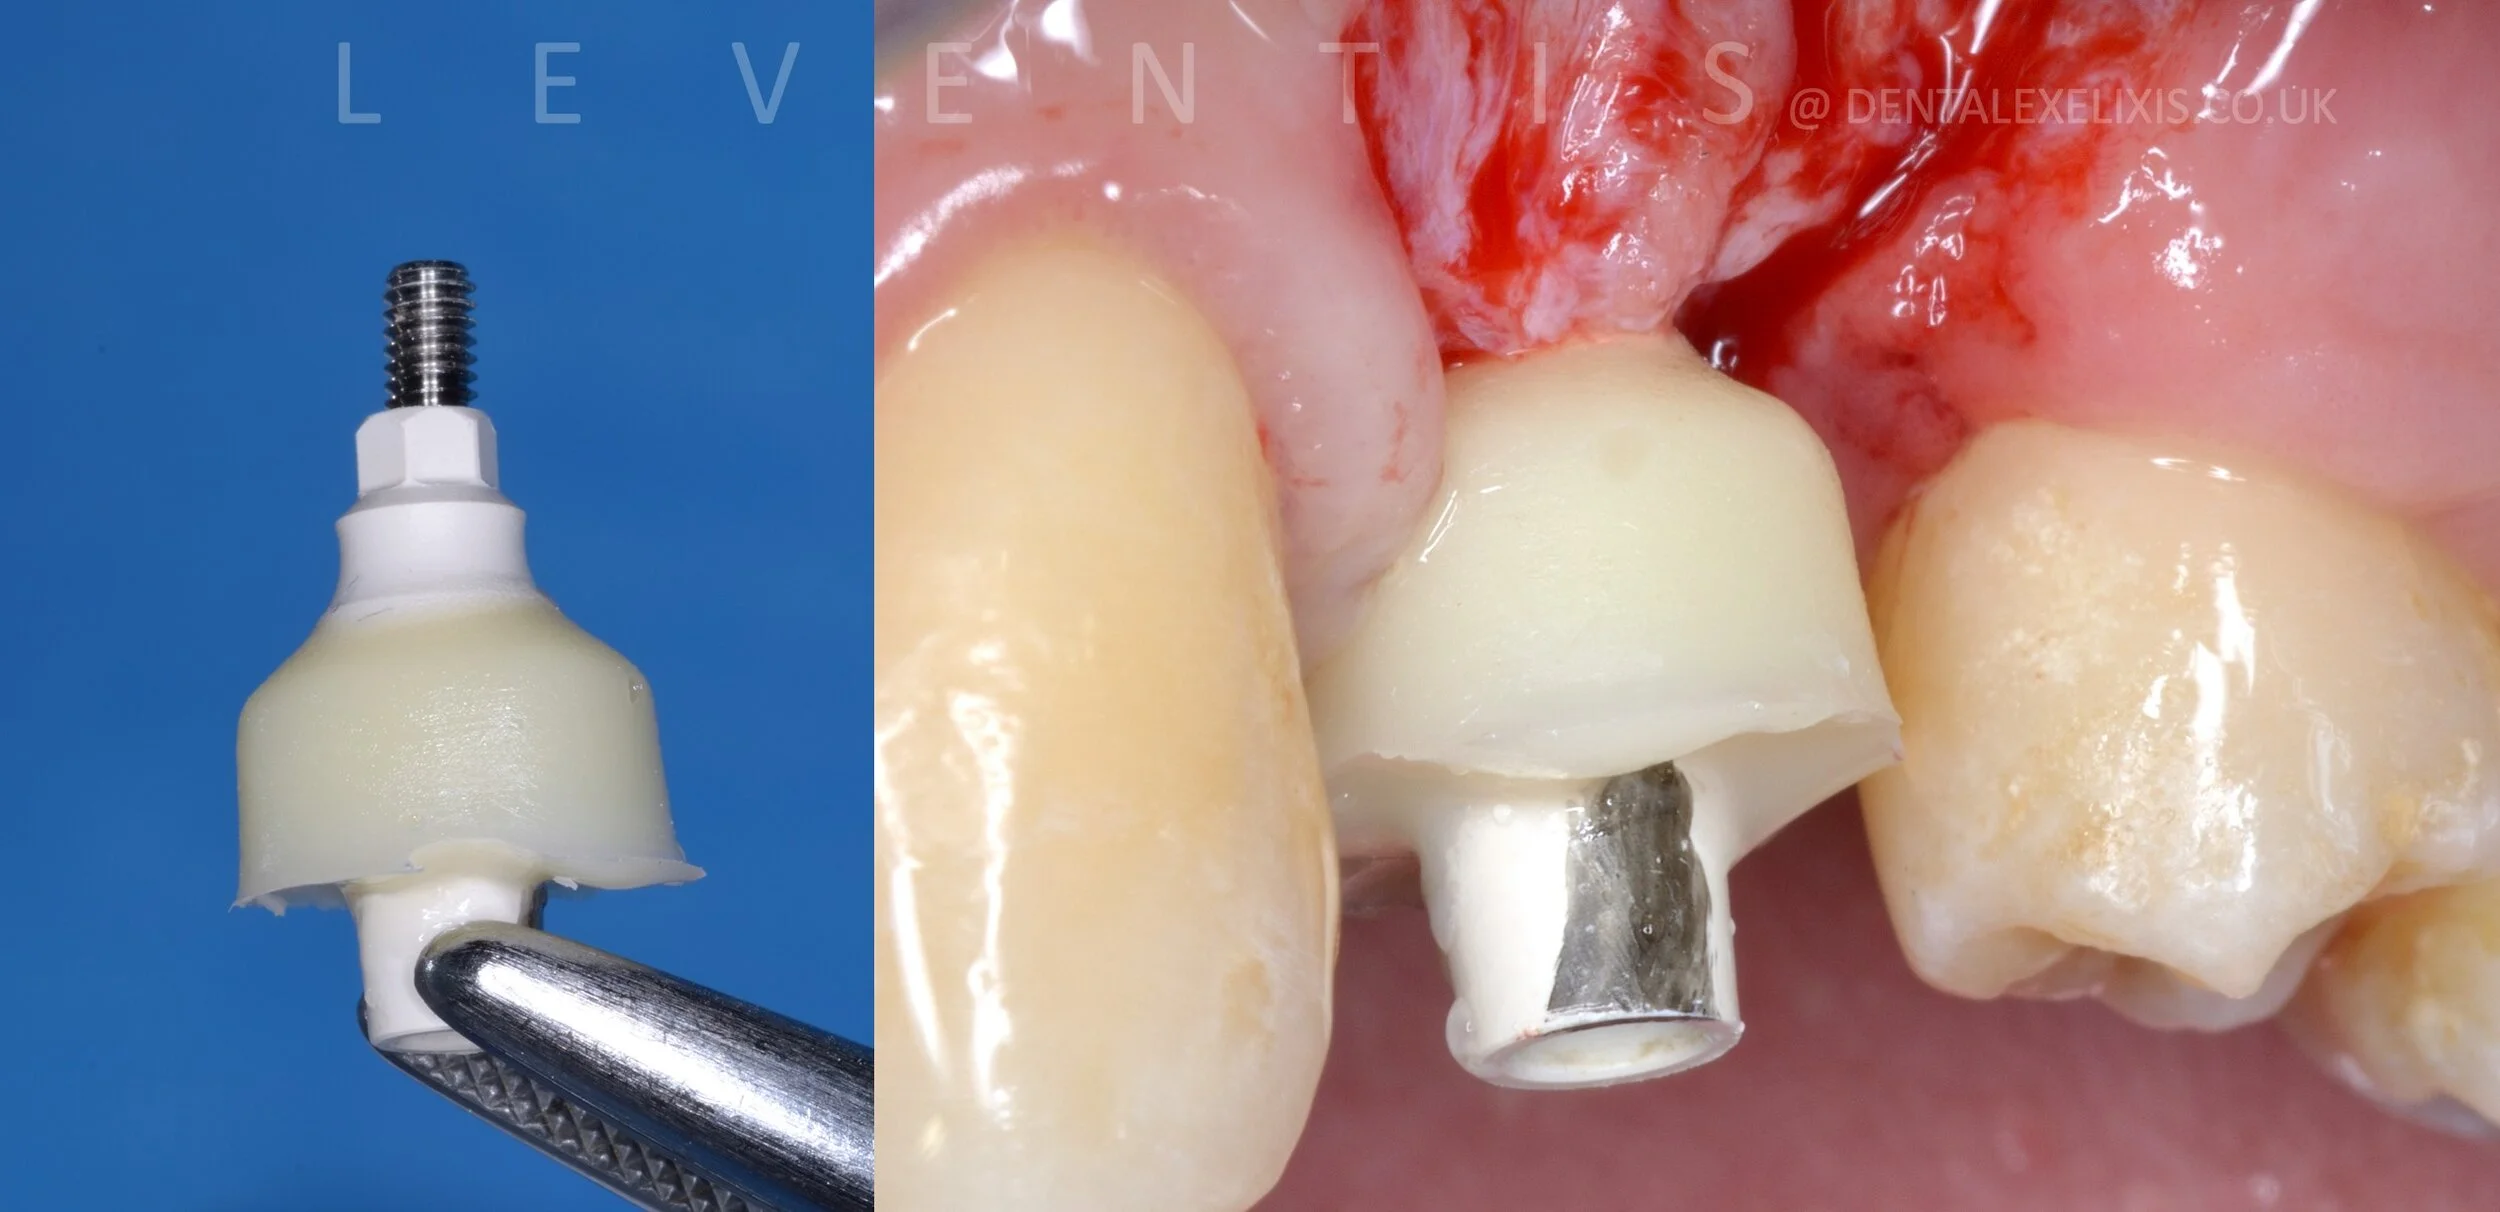
After fitting and torquing the customised abutment, the area was grafted with a synthetic osteoinductive biomaterial. 0.3cc of fully-resorbable silicate b-TCP (Powerbone Putty) were used.
No membranes or soft tissue grafting.
The screw-access chamber and the prosthetic implant platform may become a pool of anaerobic bacteria, resulting in bacteria growth in the internal parts of the implants. This is the reason for the strong bad odour when we remove implant crowns, or healing provisional restorations. The existence of bacteria along the components of the implant and the bacterial leakage at the abutment-fixture interface might be an important cause of chronic inflammation and marginal bone loss. This is why I always use an antibacterial sealant -SilverPlug in all my cases, instead of using teflon tape.
Sutured with PTFE 5-0.
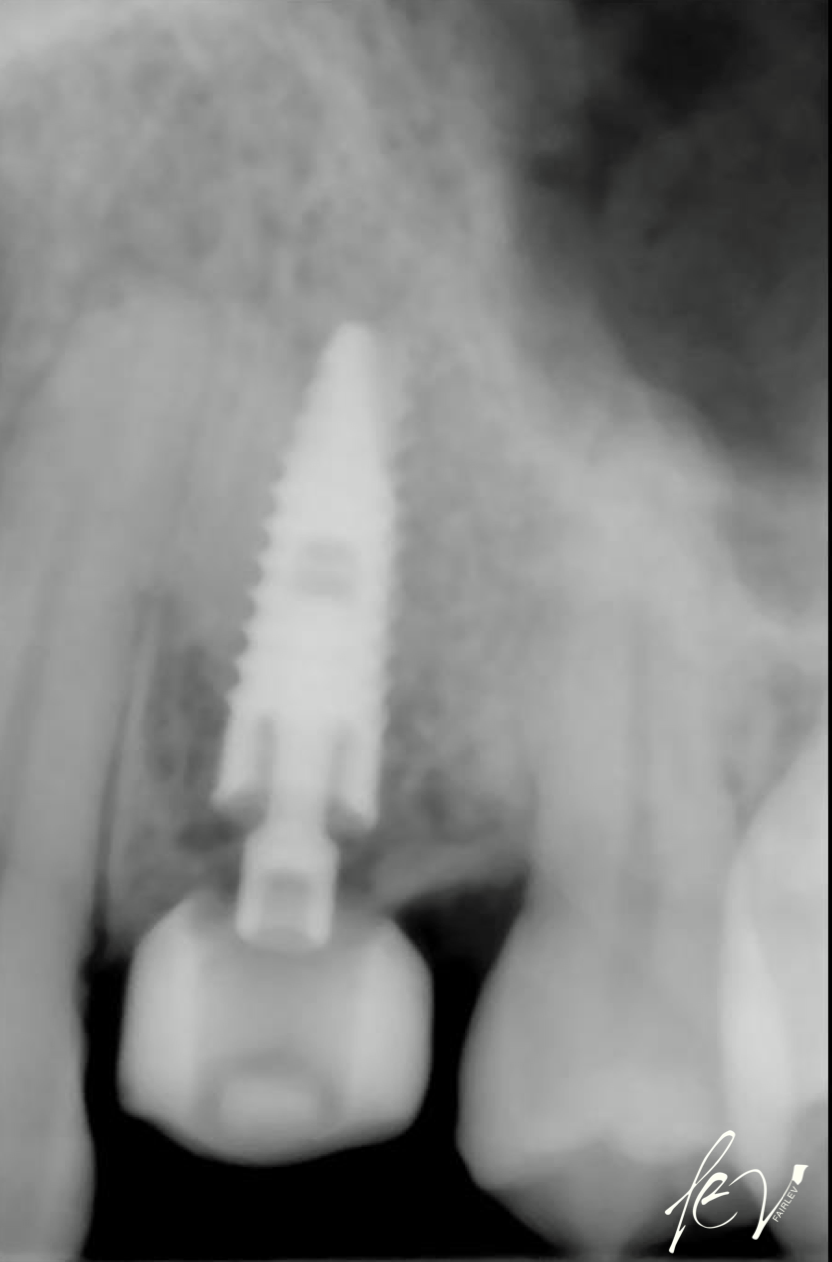
Periapical x-ray immediately post-op.
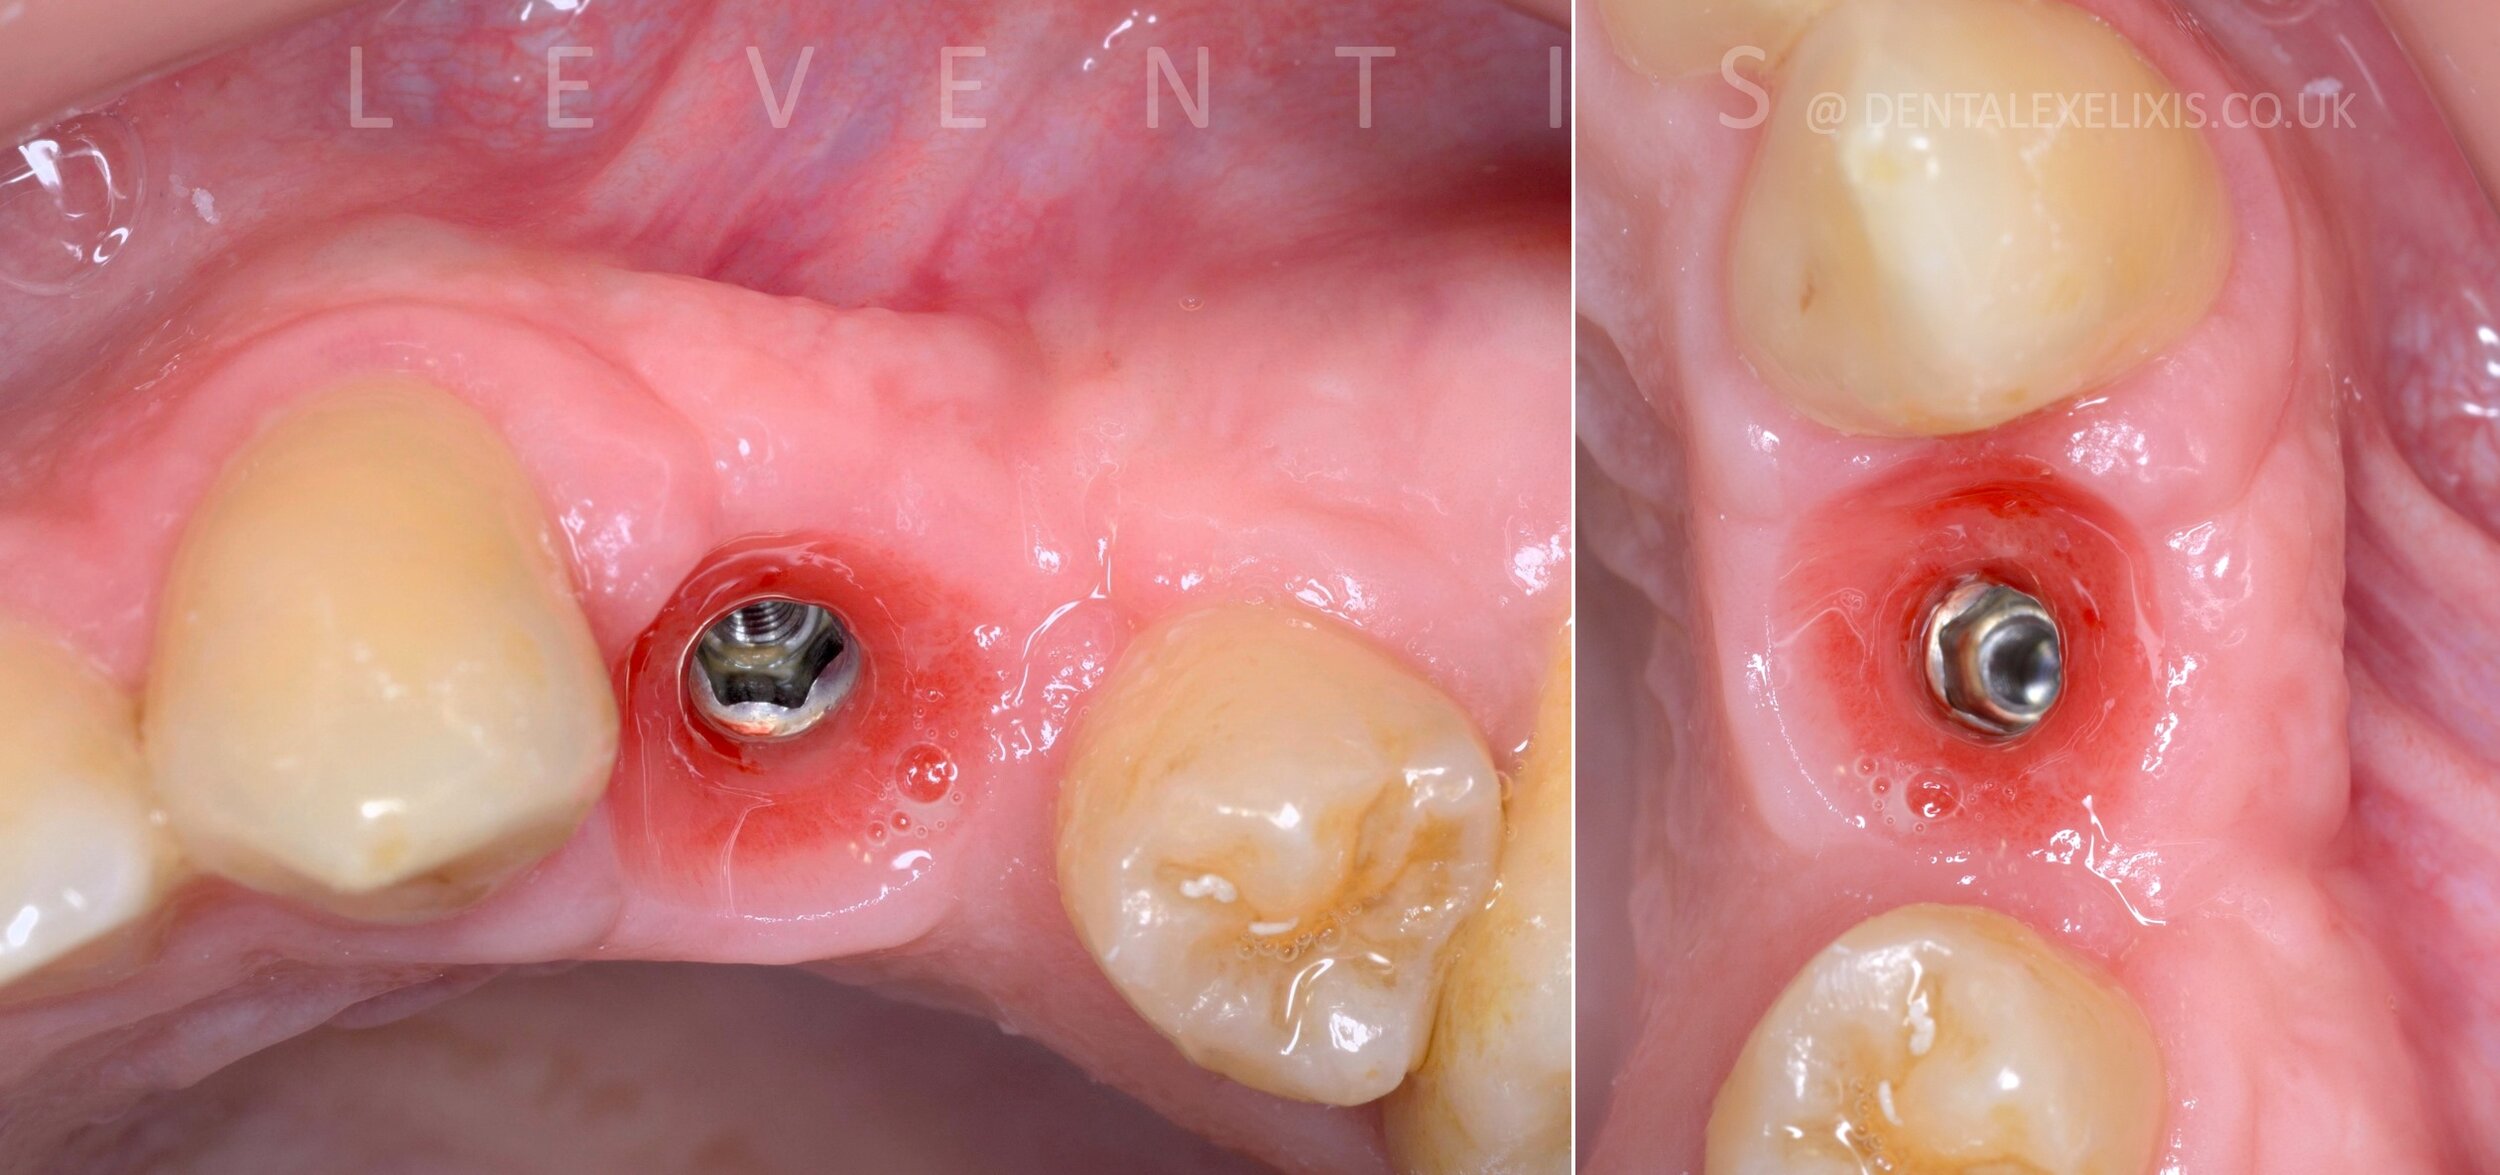
Clinical result 3 months post-op.
The patient is now ready to go back to the referral dentist for the prosthetics.
It is very important that as an implant surgeon I generate the proper emergence profile, which leads to the best aesthetic, functional and biological sound result.
The minimally invasive routine protocol used.